Snowflake Destination
This page will guide you through setting up an ELT pipeline using Snowflake to fetch data from a KYVE data pool and import it into a Snowflake data warehouse.
About Snowflake
The KYVE Data Pipeline enables easy import of KYVE data into any data warehouse or destination supported by Airbyte. With the ELT format, data analysts and engineers can now confidently source KYVE data without worrying about its validity or reliability.
This tutorial will guide you through setting up an ELT pipeline to fetch data from a KYVE data pool and import it into the Snowflake data warehouse.
A data warehouse is a centralized repository of data that is optimized for querying and analysis. It is designed for analytical processing (OLAP). A data warehouse can handle large volumes of data and complex queries, while a relational database is more suitable for handling small transactions in real-time. A data warehouse provides a way for businesses to consolidate data from various sources into a single location, which can then be used to make better decisions.
Snowflake is used by a wide range of businesses and industries, from startups to large enterprises. Some main user groups that utilize Snowflake include business analysts, data scientists, data engineers and executives.
Snowflake Setup
Prerequisites
These instructions assume that you already have a Snowflake account. For more information on how to get started with an account, go here.
Once the Snowflake data warehouse is set up, we can configure it as a destination for Airbyte. We are going to be utilizing the UI via the Web browser:
Open a web browser and go to the Snowflake web application.
Log in to your account using your Snowflake username and password.
Once logged in, click on the
Worksheetoption from the sidebar. Then, click on the+ Worksheetbutton on the top right of the page to open a new worksheet.
In order to create a connection, you will need the following:
HostUsernameRolePasswordWarehouseDatabaseDefault Schema
Below are the instructions to create/get the required parameters.
NOTE: The worksheet you just opened can act as your query editor. All the SQL queries you'll see below need to be run there.
Configuring Snowflake
Host
Go to Admin > Accounts and then locate your user. Hover over the clip icon beside the account name to get your
host. It
should be in the format <your_account.snowflakecomputing.com>.

Username
To create a user you can either create it on the UI or using SQL:
From the UI, under
Admin>Users & Roles>+ User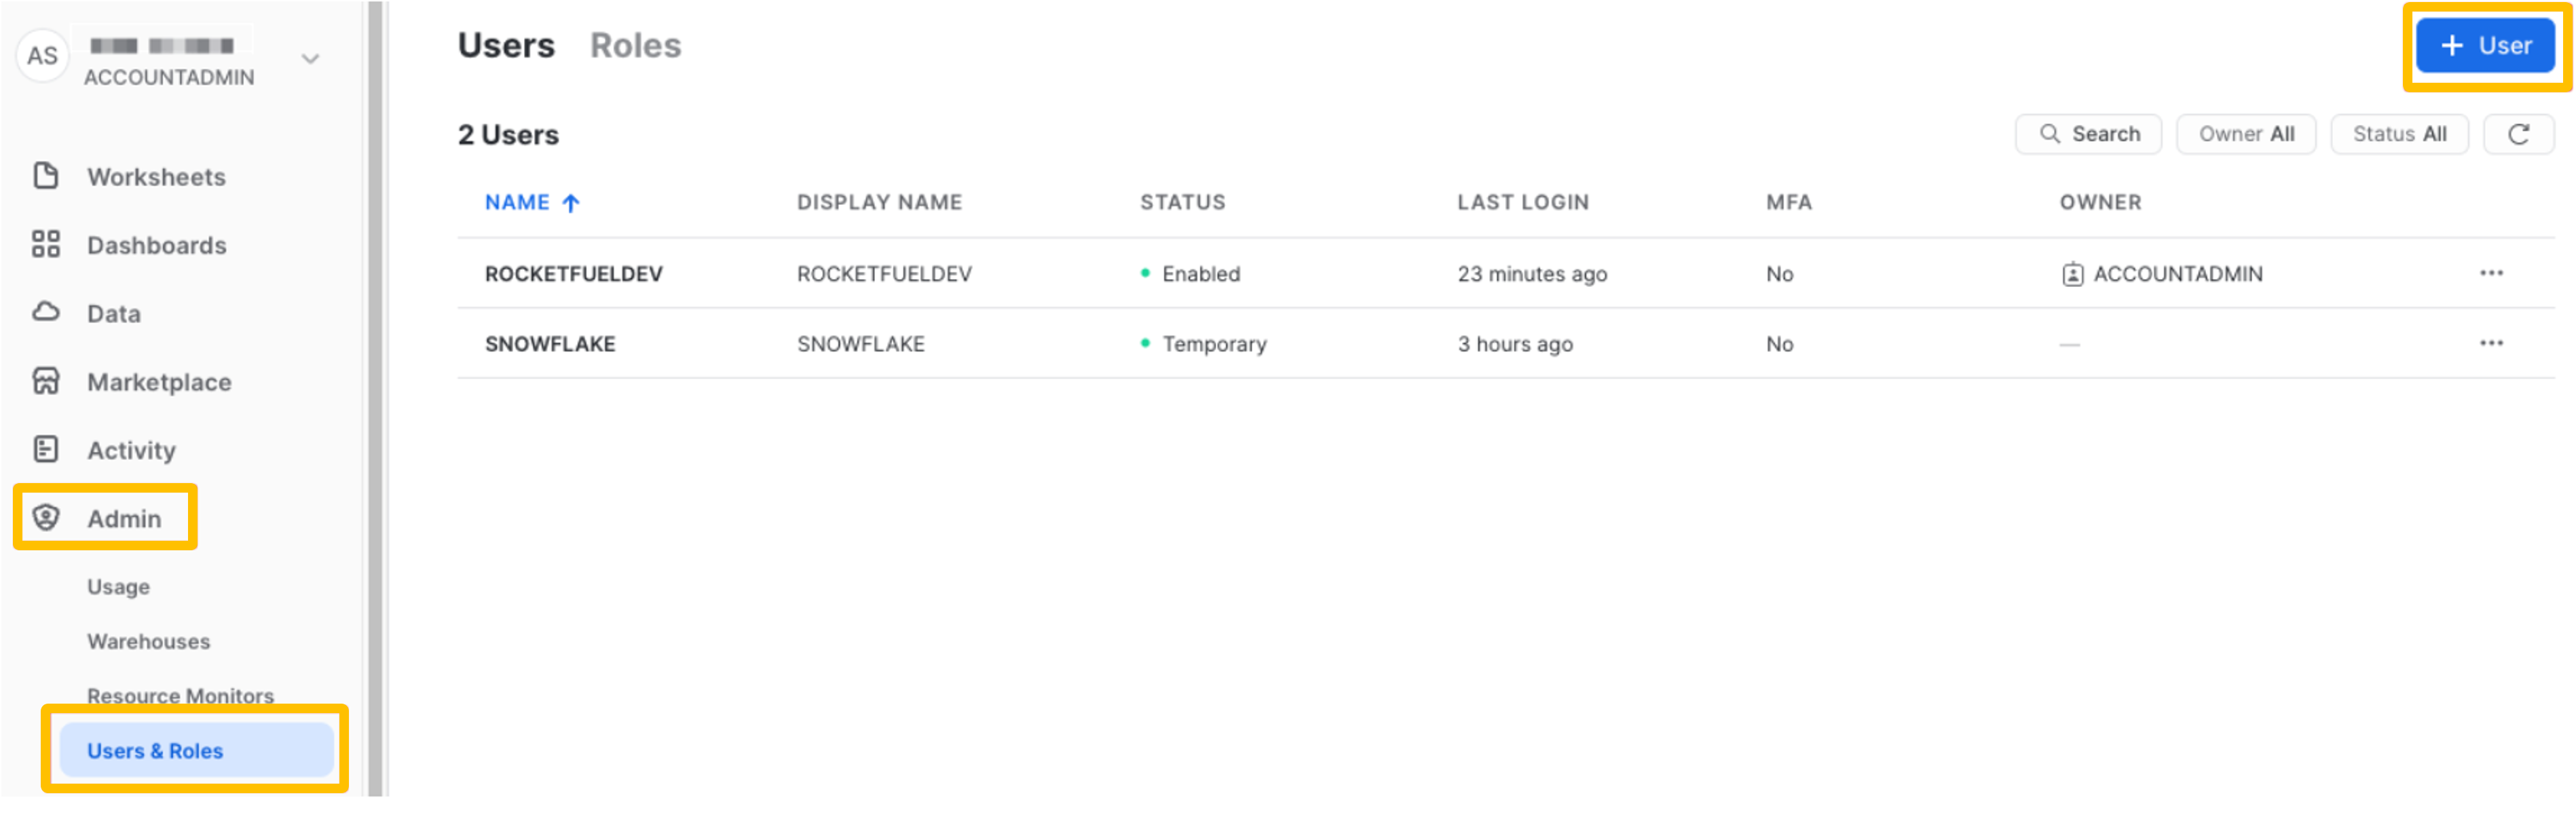
Using SQL:
To run this command, the current user must have a
USERADMINrole or one with higher privileges (run this command in the worksheet):NOTE: An owner with
ACCOUNTADMINprivileges will work as well since it has higher level of access thanUSERADMIN.CREATE USER <user_name_of_choice>;
This will serve as the username when creating the connection.
Role
- To find the user role, go to
Admin>Users & Roles. - Select your user to expand and get detailed information including the role.
Password
If no password is set up, you can run this SQL command for your username (run this command in the worksheet):
ALTER USER <your_username> SET PASSWORD = <your_pass_as_string>;
Warehouse
To create a warehouse you can either create it on the UI or by using SQL:
From the UI, under
Admin>Warehouses>+ Warehouse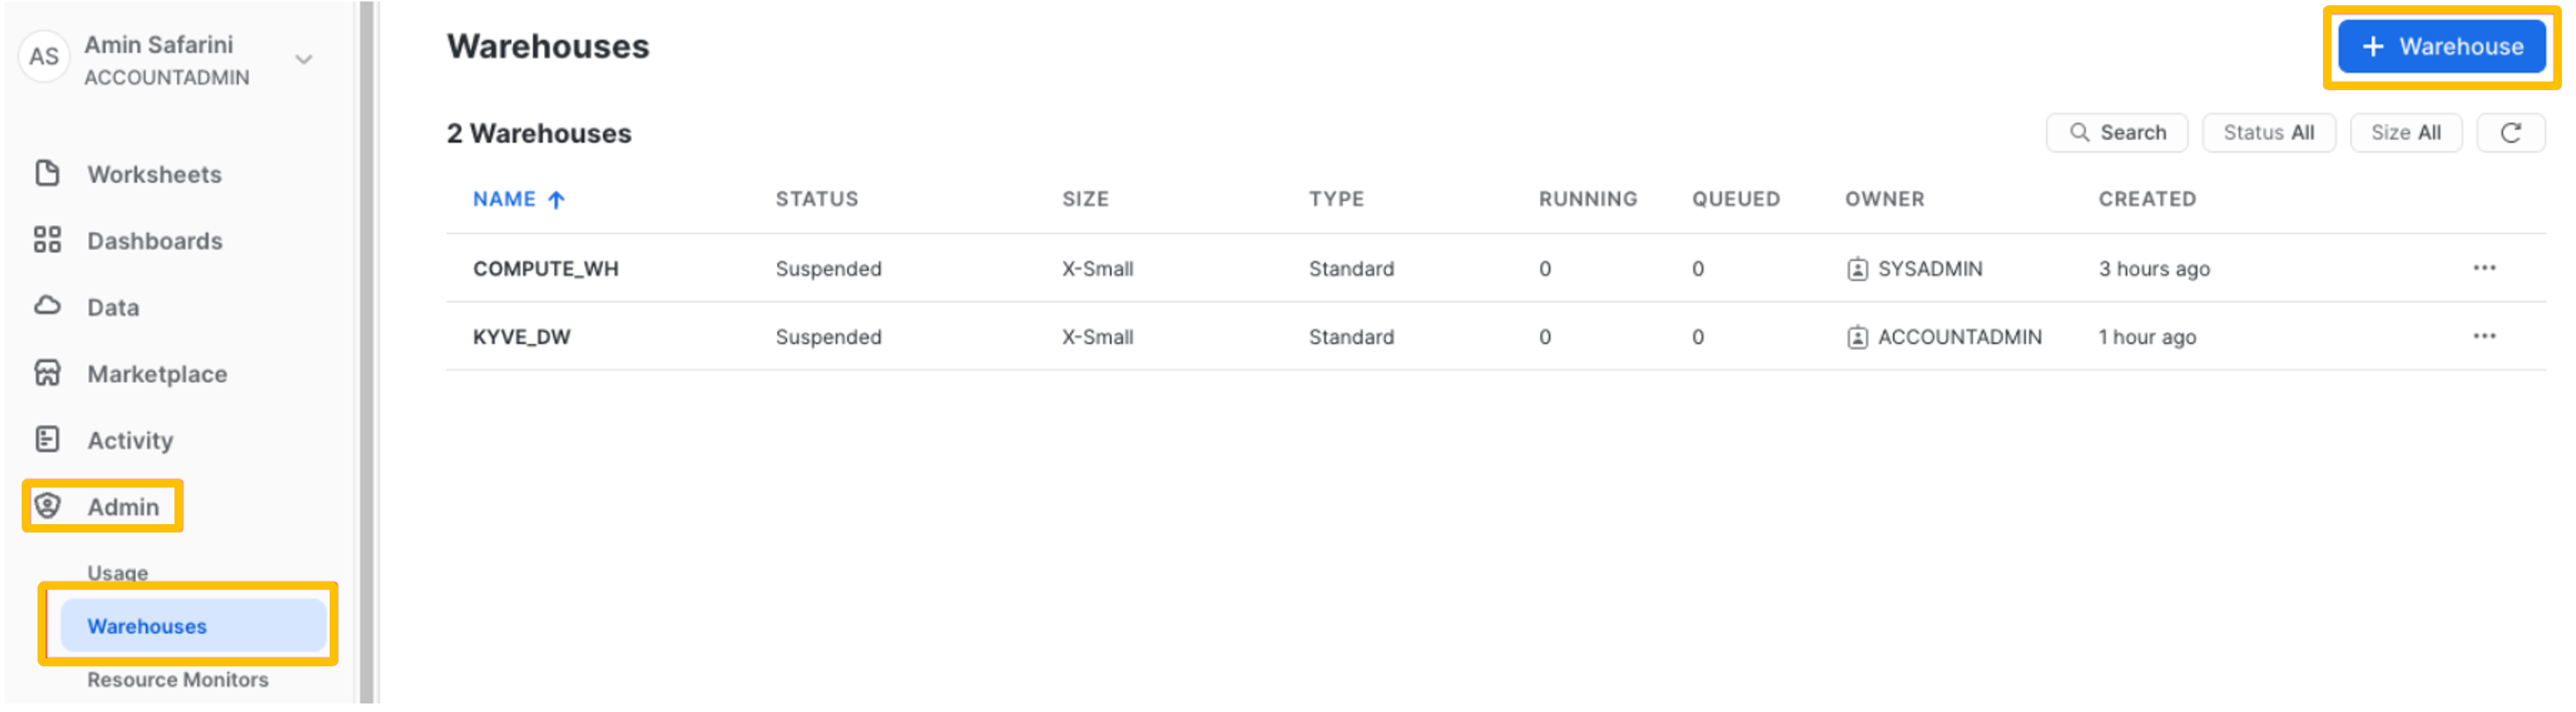
Input a
Nameand choose theSize(here he choseX-Smallfor the sake of this tutorial).
Using SQL
To run this command the current user must have a
SYSADMINrole or higher (run this command in the worksheet):CREATE OR REPLACE WAREHOUSE <warehouse_name_of_choice> WITH warehouse_size=<size_of_warehouse_as_string>;
Database
To create a database you can either create it on the UI or by using SQL:
From the UI, under
Data>Databases>+ Database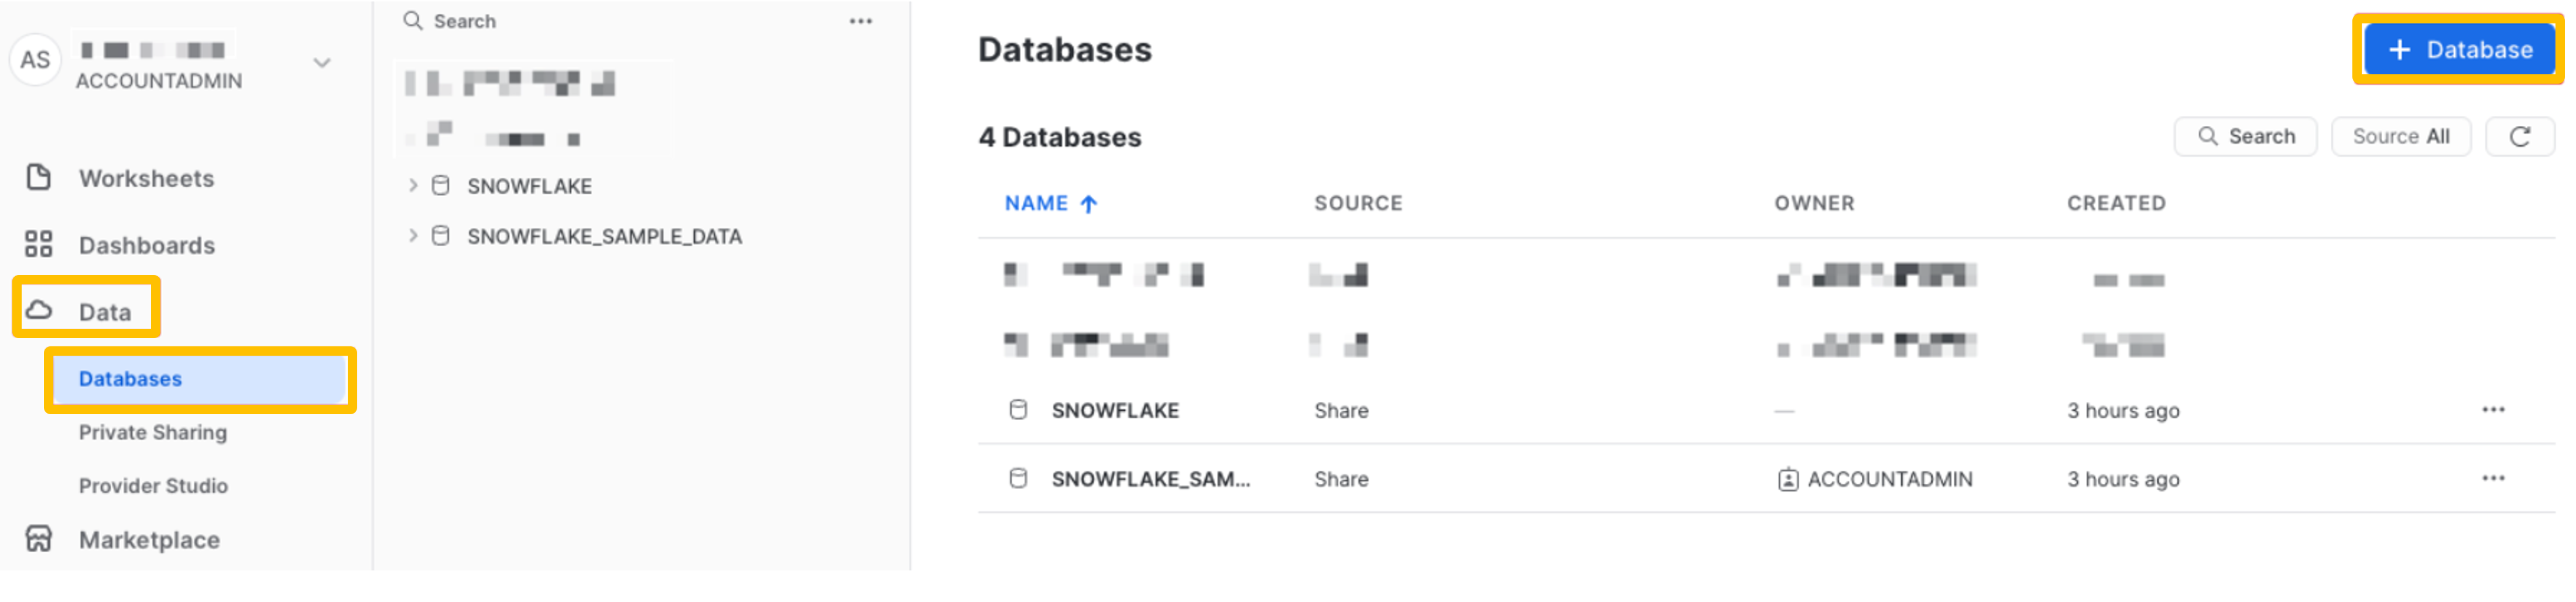
- Input a
Nameand click onCreateto create the database.
- Input a
Using SQL
To run this command the current user must have a
SYSADMINrole or higher (run this command in the worksheet):CREATE DATABASE <db_name_of_choice>;
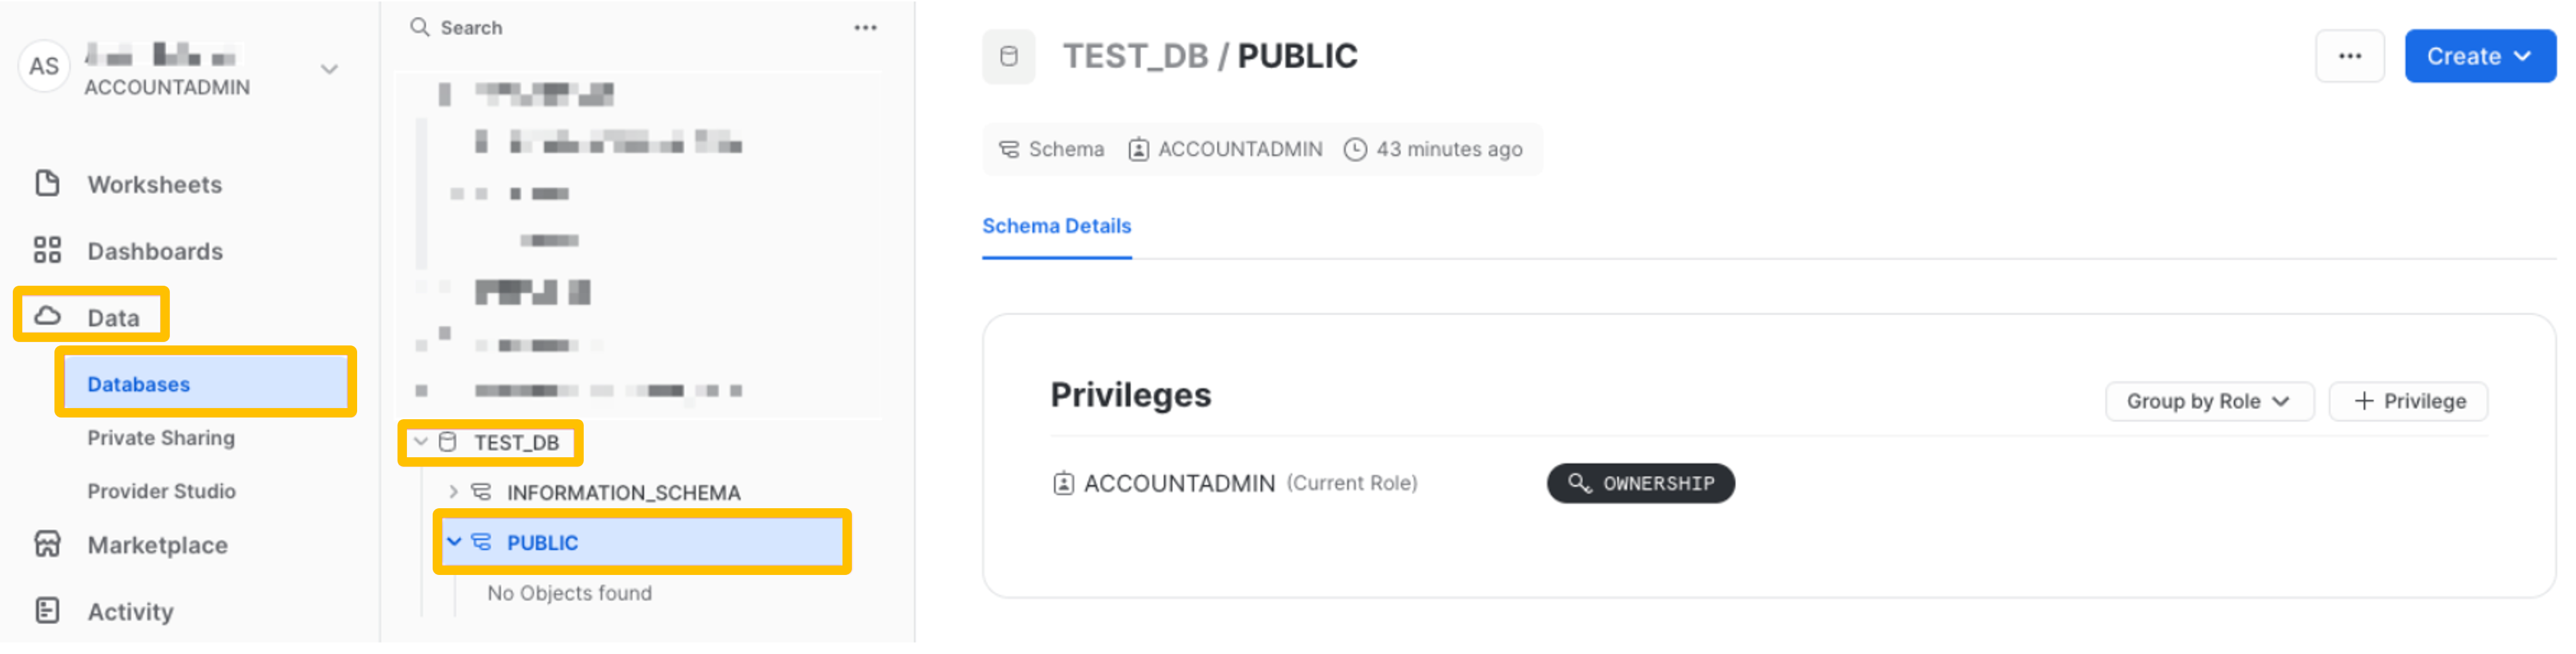
Default Schema
The default schema is the schema you want to work with. Typically, it is public.
Create an ELT pipeline
Now you are ready to go on the Airbyte app (http://localhost:8000/) and create a new connection.
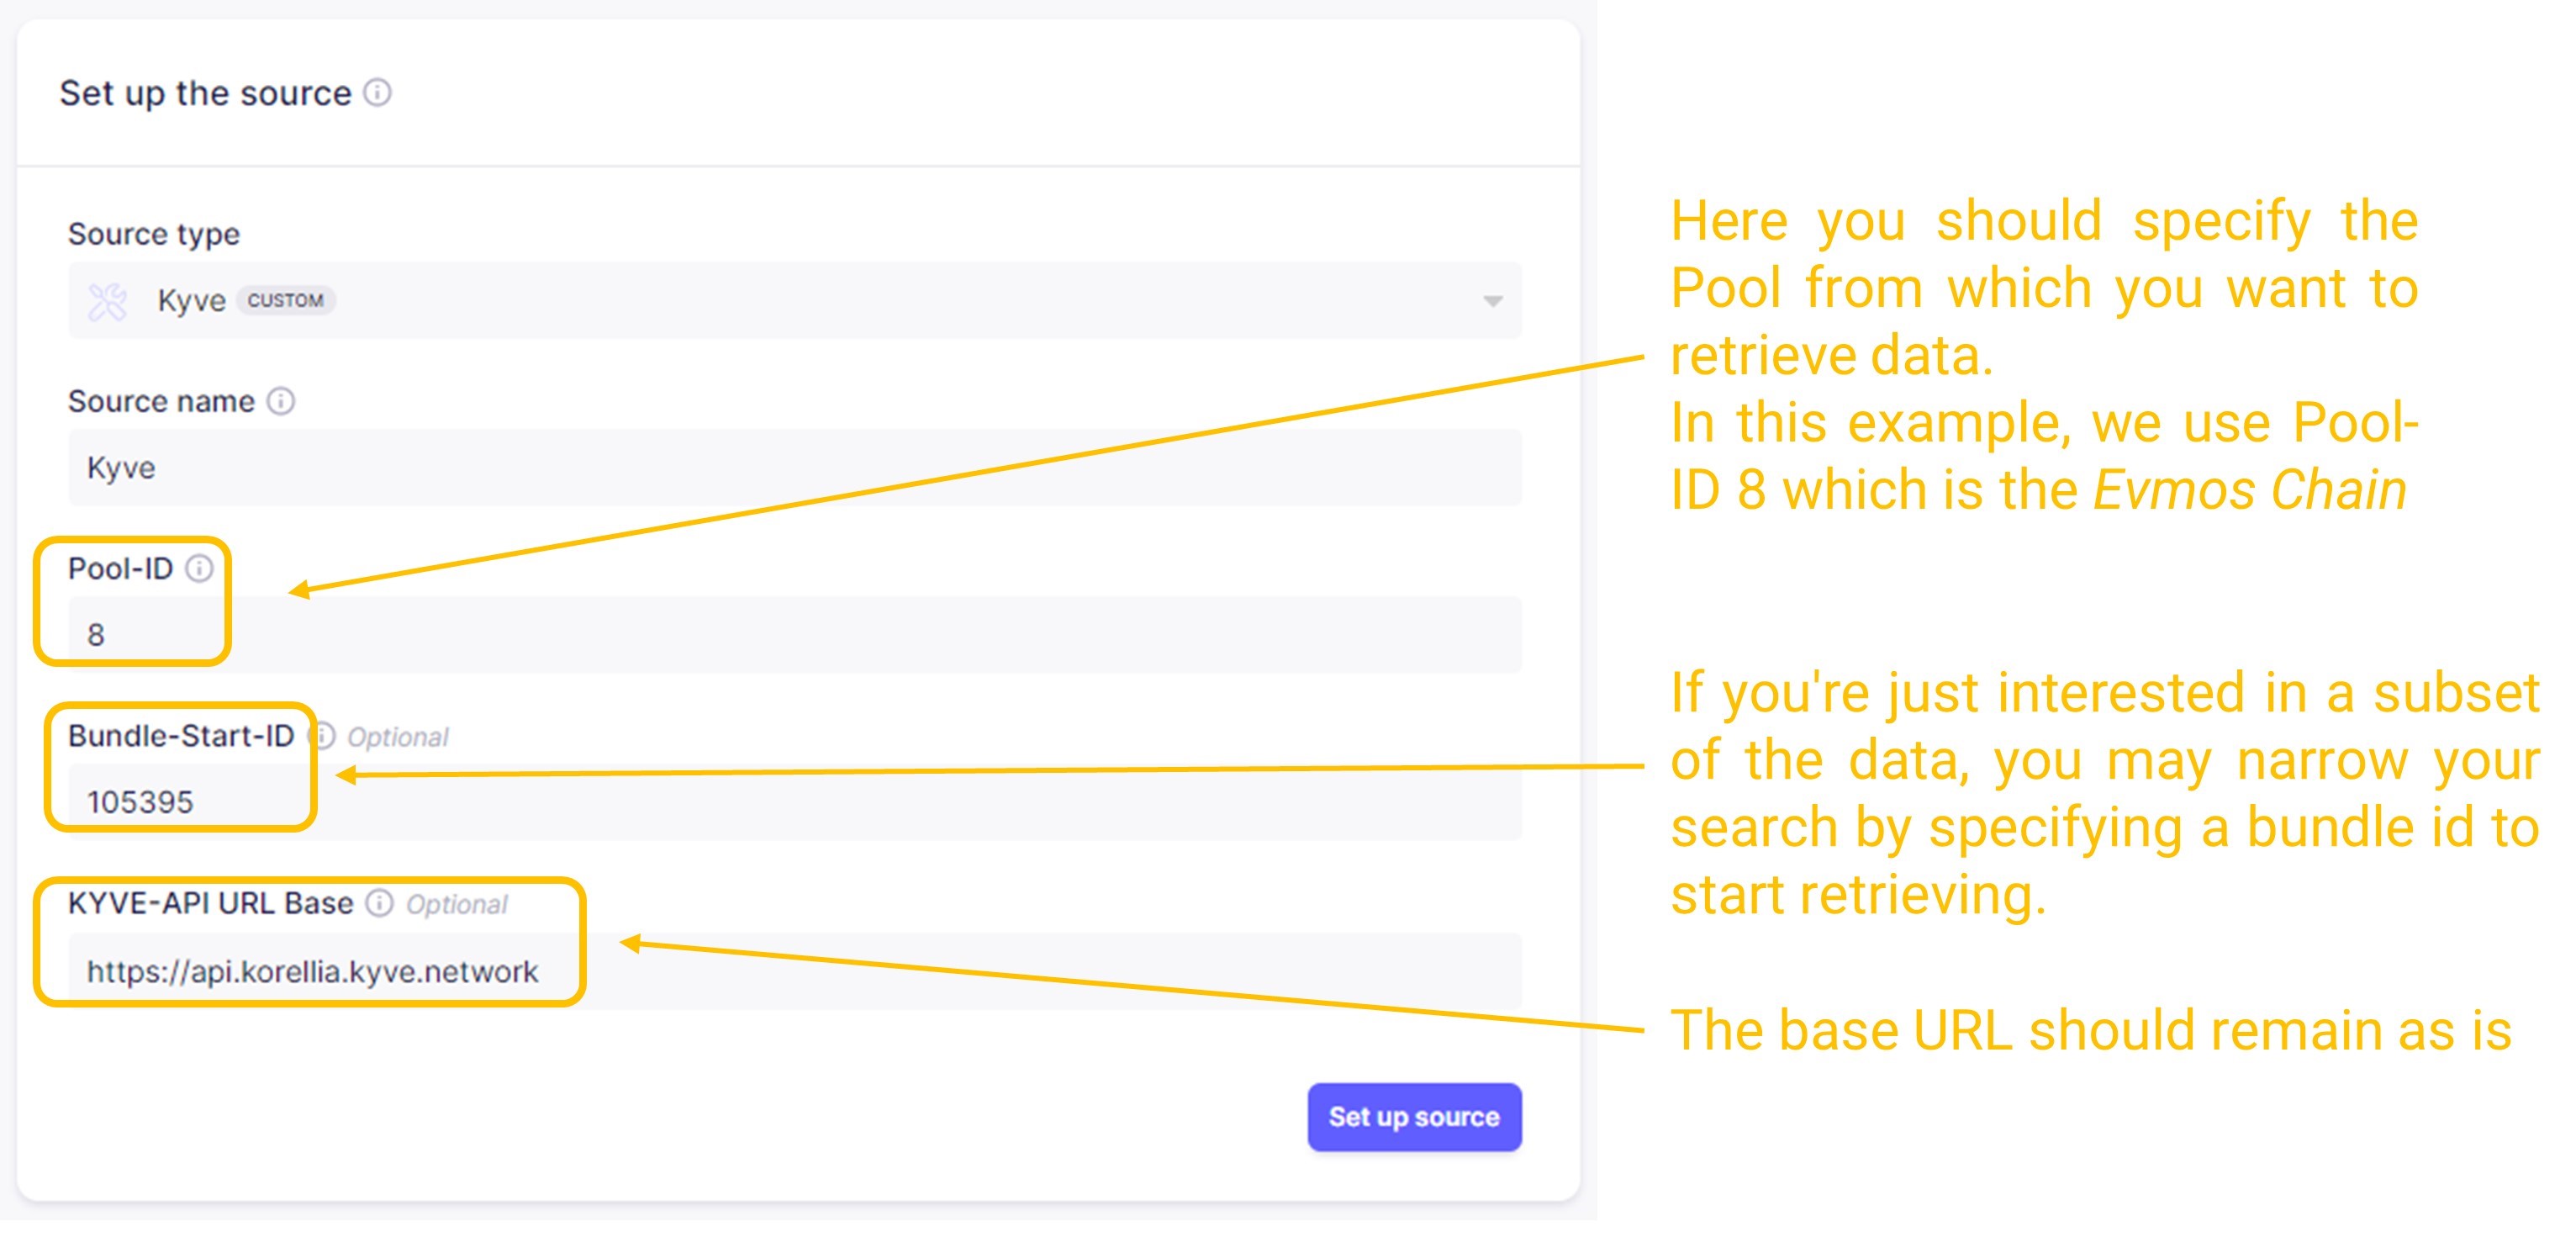
Set up the source.
In this step you should specify the KYVE pool from which you want to retrieve data. You can specify a specific Bundle-Start-ID in case you want to narrow the records that will be retrieved from the pool. You can find the bundles of your pool choice in the KYVE app. For example here are the bundles of Pool ID
8, the Evmos chain.For this example we choose:
- Pool-ID:
8which refers to the Evmos chain. - Bundle-Start-ID:
105395(or choose anotherBundle-Start-ID) - KYVE-API URL Base: This should remain as is.
- Pool-ID:
Set up the destination.
Go to Connections ->
+ New Connection, choose Kyve source (existing source) and click on theUse existing sourcebutton:
Select as destination type
Snowflake. You will automatically be taken to a page to add the setup details of the Snowflake Warehouse that you set before.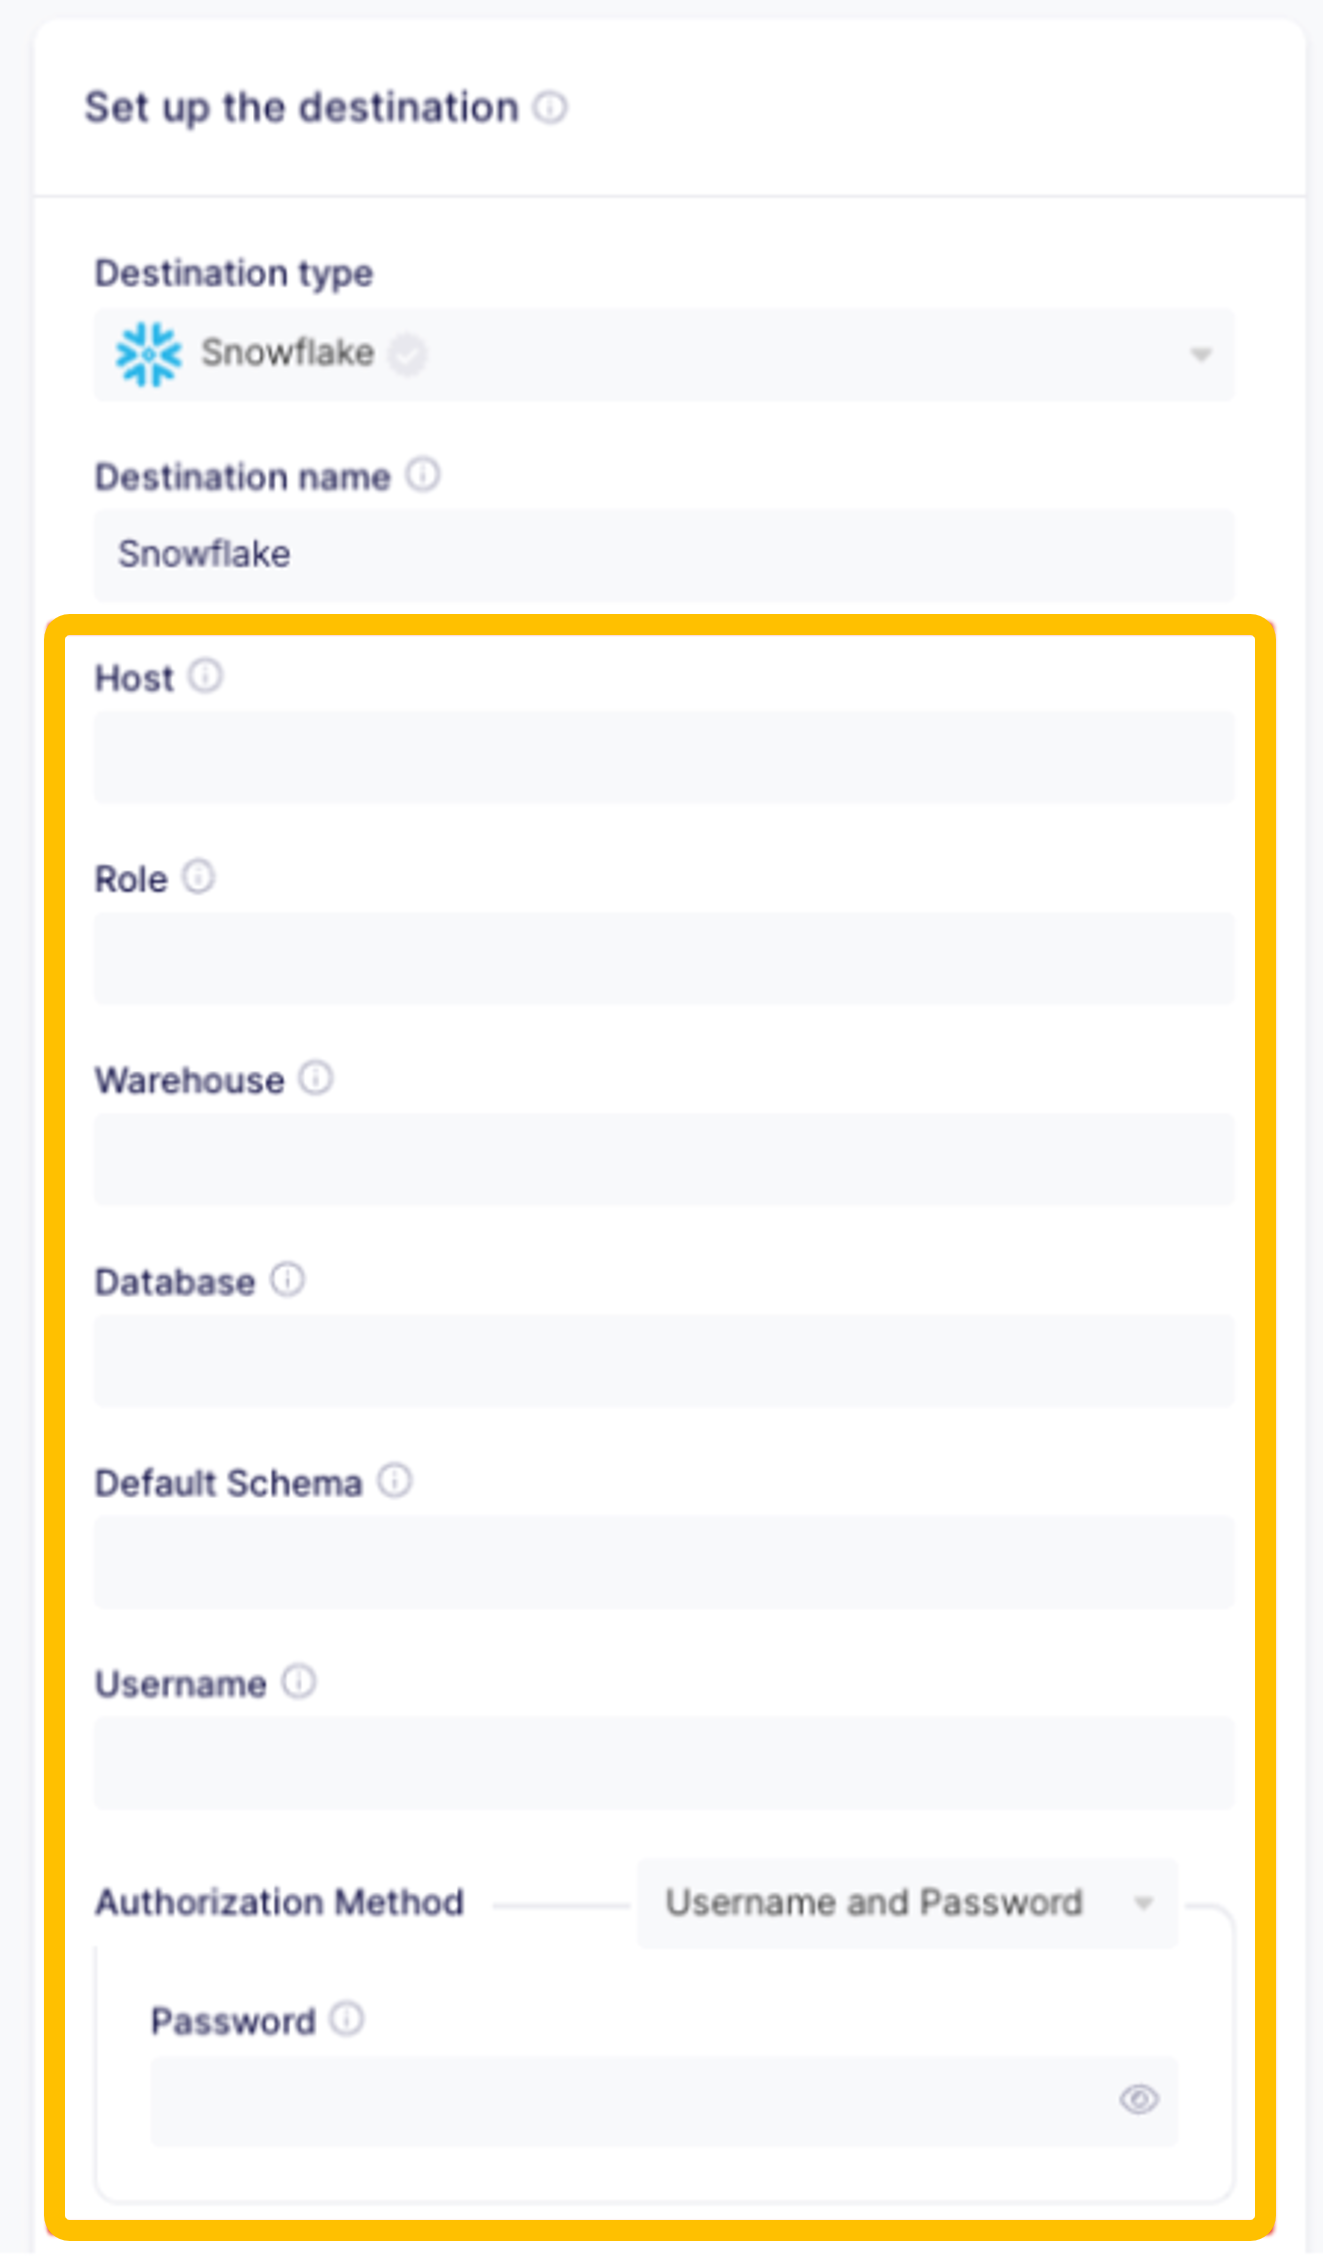
For the authorization method, use
UsernameandPasswordand enter the parameters you saved before.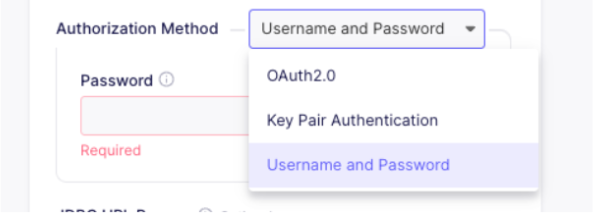
Final ELT configuration.
This is the final step where you can modify the pipeline.
In the Transfer field, you can set how often the data should sync to the destination. For this example, you could set it to
Manual.In the Streams section, you can modify the Namespace, and you can add a Prefix for the data that will be stored.
In the Activate the streams you want to sync section, you can modify the behavior of the stream in each repetition. For this example, you could set it to
Incremental|Append, which means that only new records will be stored on each new sync and will be appended in the DB.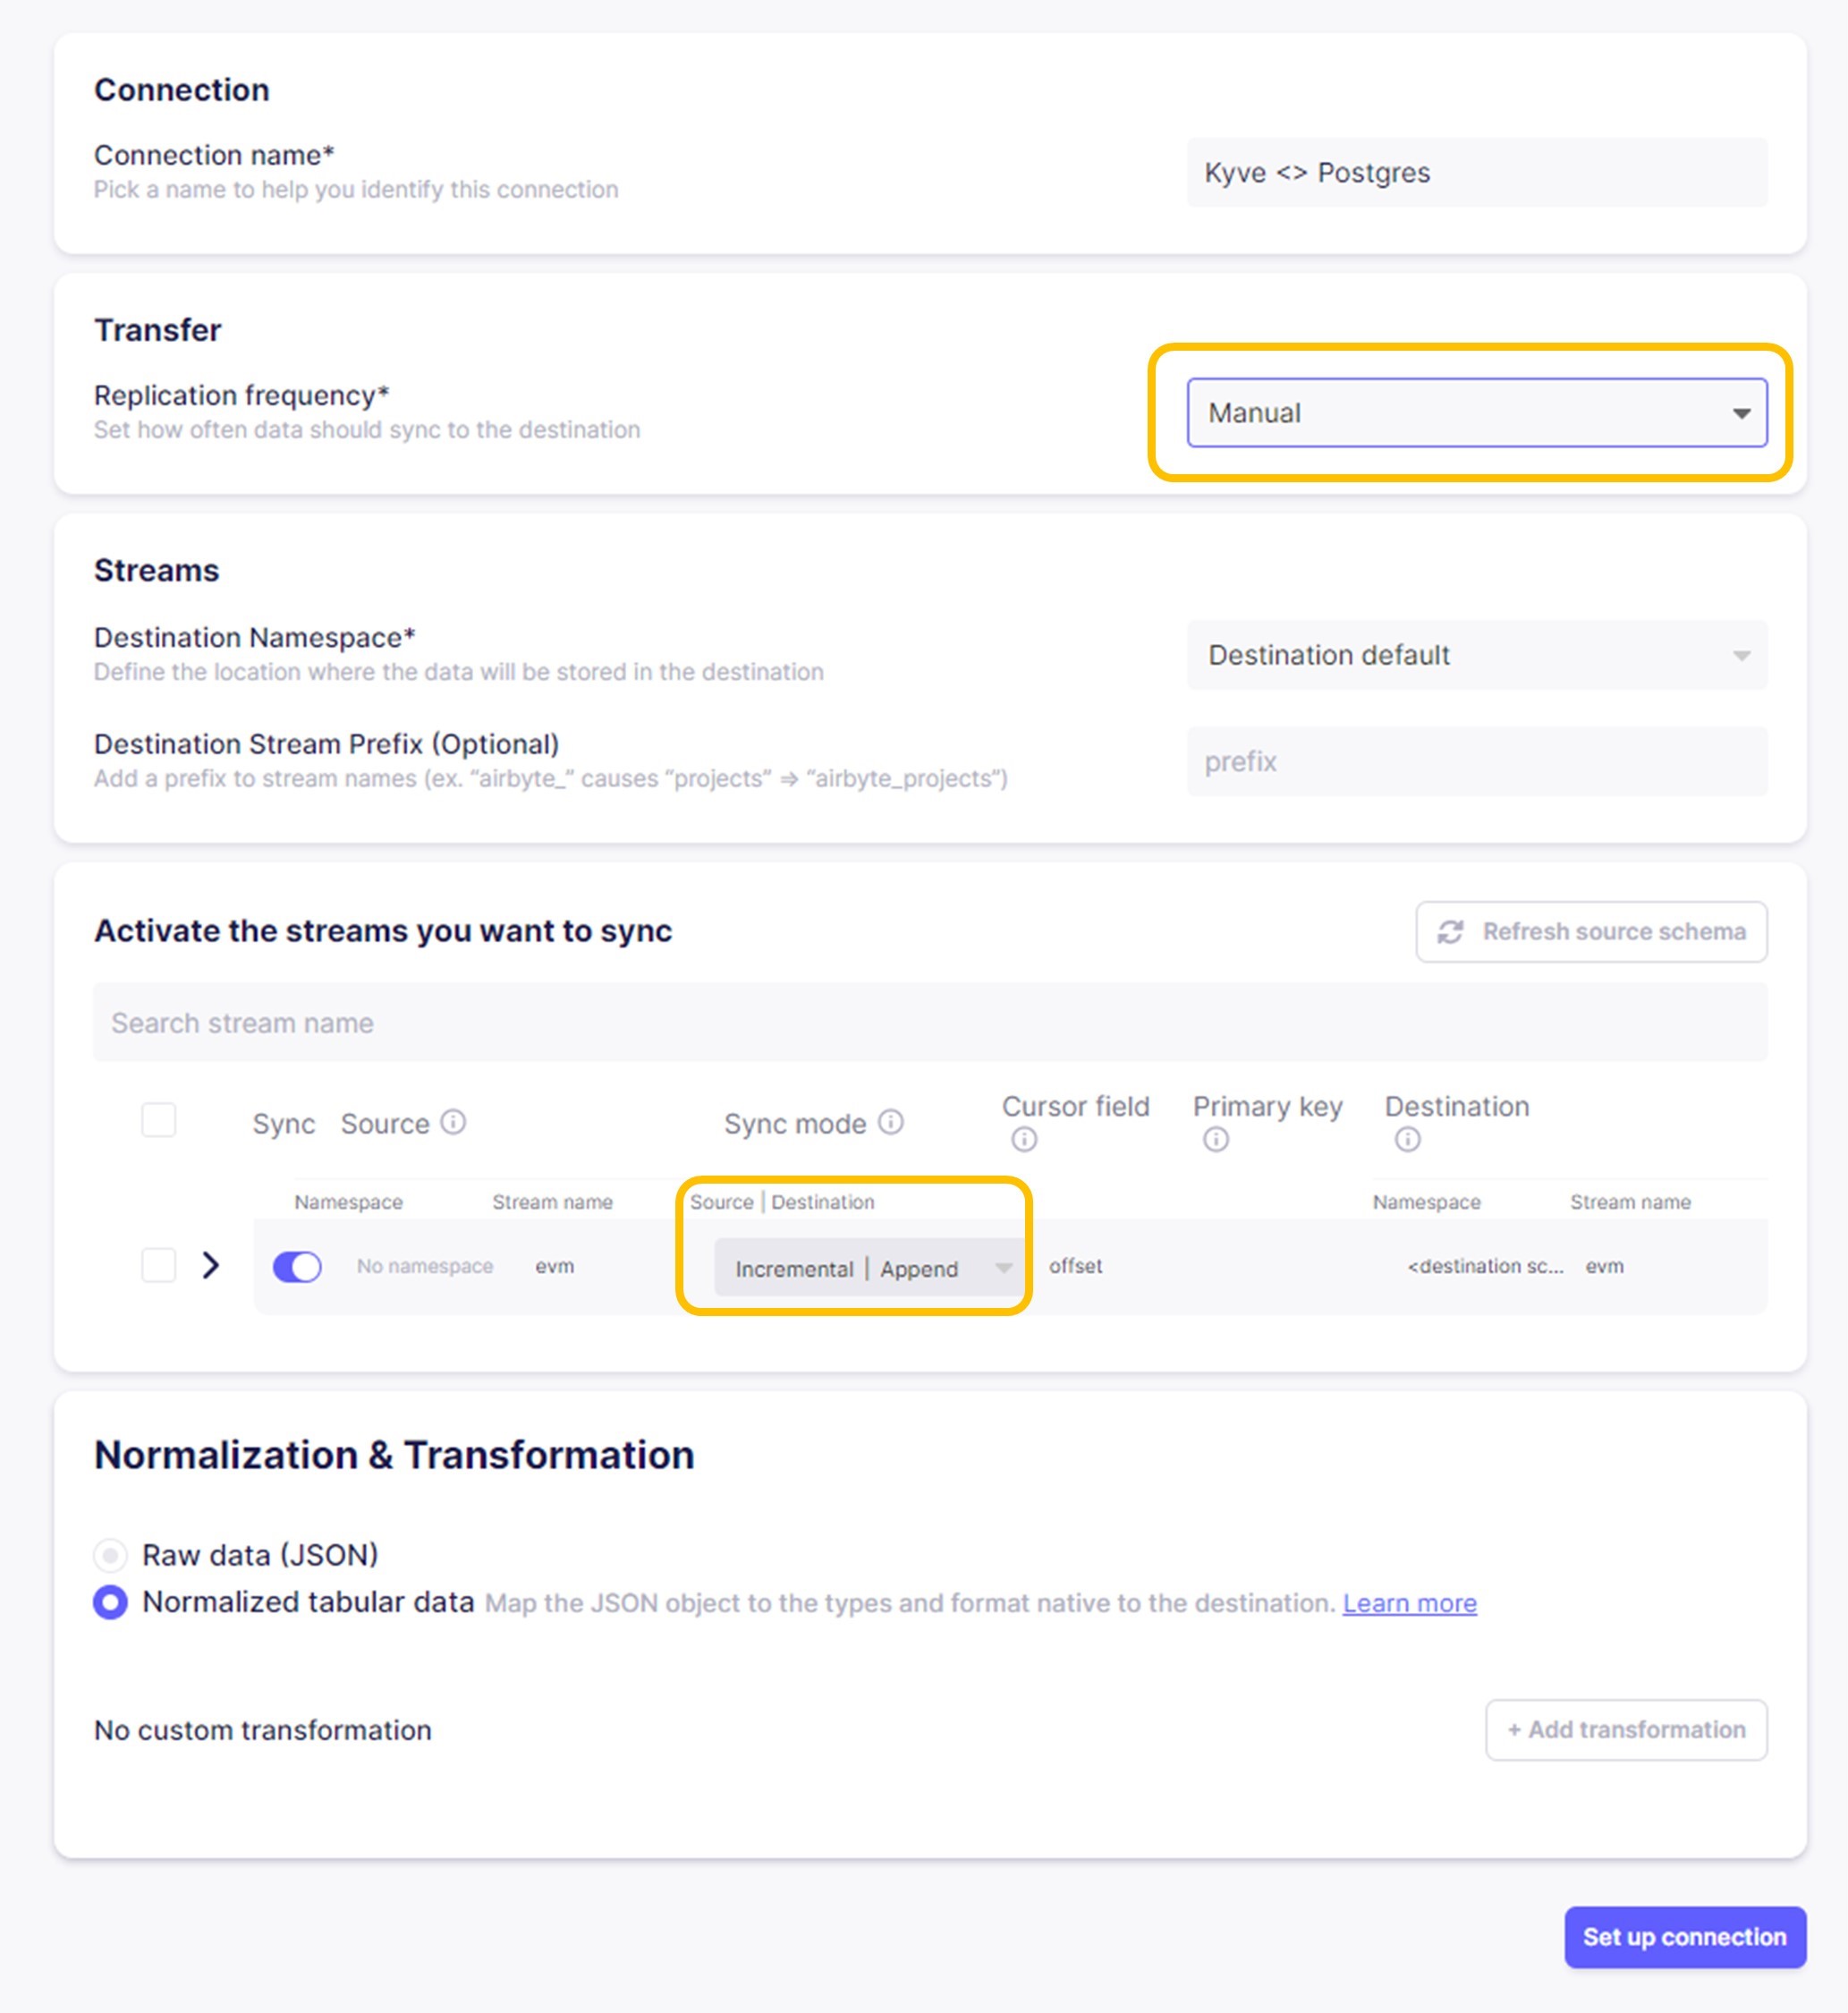
View Stored Data
To view the data you just synced from KYVE, go back to your Snowflake UI, select the worksheet you created
earlier and try out the following queries. All variables inside <> need to be changed according
to the variables you set.
Query the table with the raw data:
SELECT * FROM <DATABASE_NAME>.PUBLIC._airbyte_raw_pool_8 limit 10;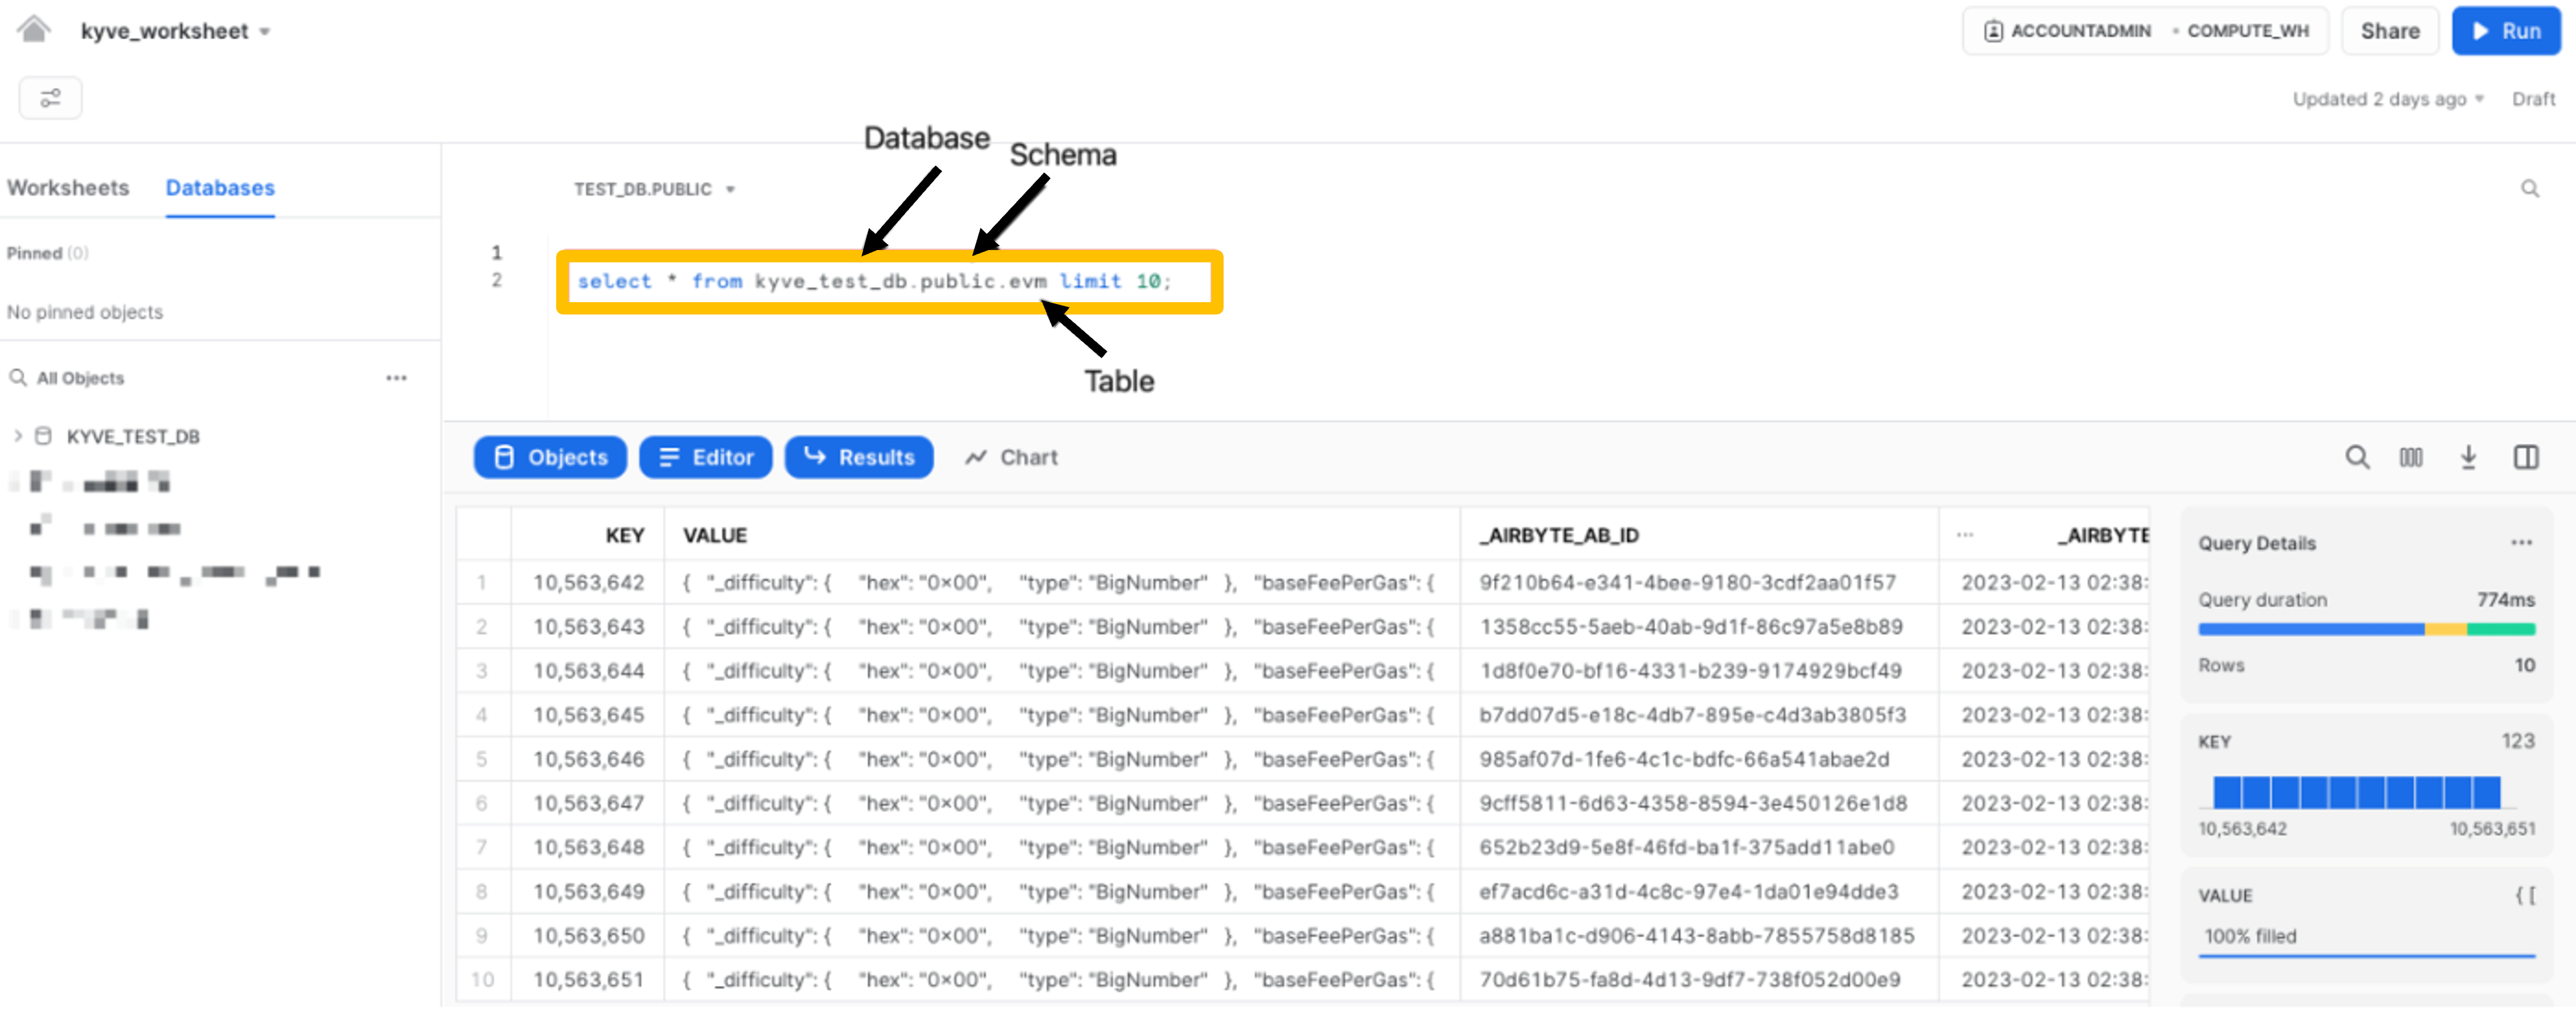
Query the table with the normalized data
SELECT * FROM <DATABASE_NAME>.PUBLIC.POOL_8_VALUE limit 10;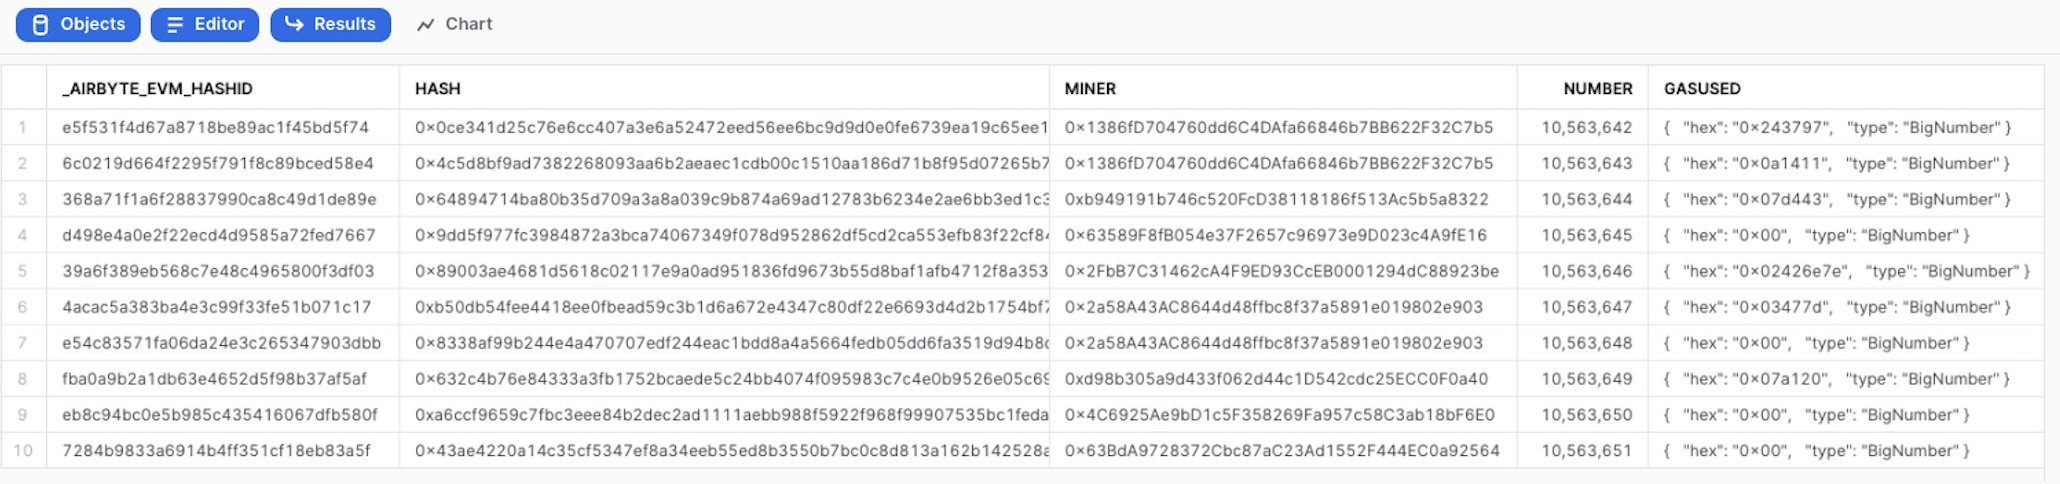
Querying data for a given miner:
Finding miners with multiple transactions:
SELECT miner, COUNT(*) as transaction_count
FROM <DATABASE_NAME>.PUBLIC.POOL_8_VALUE
GROUP BY miner
HAVING COUNT(*) > 1
ORDER BY transaction_count DESC;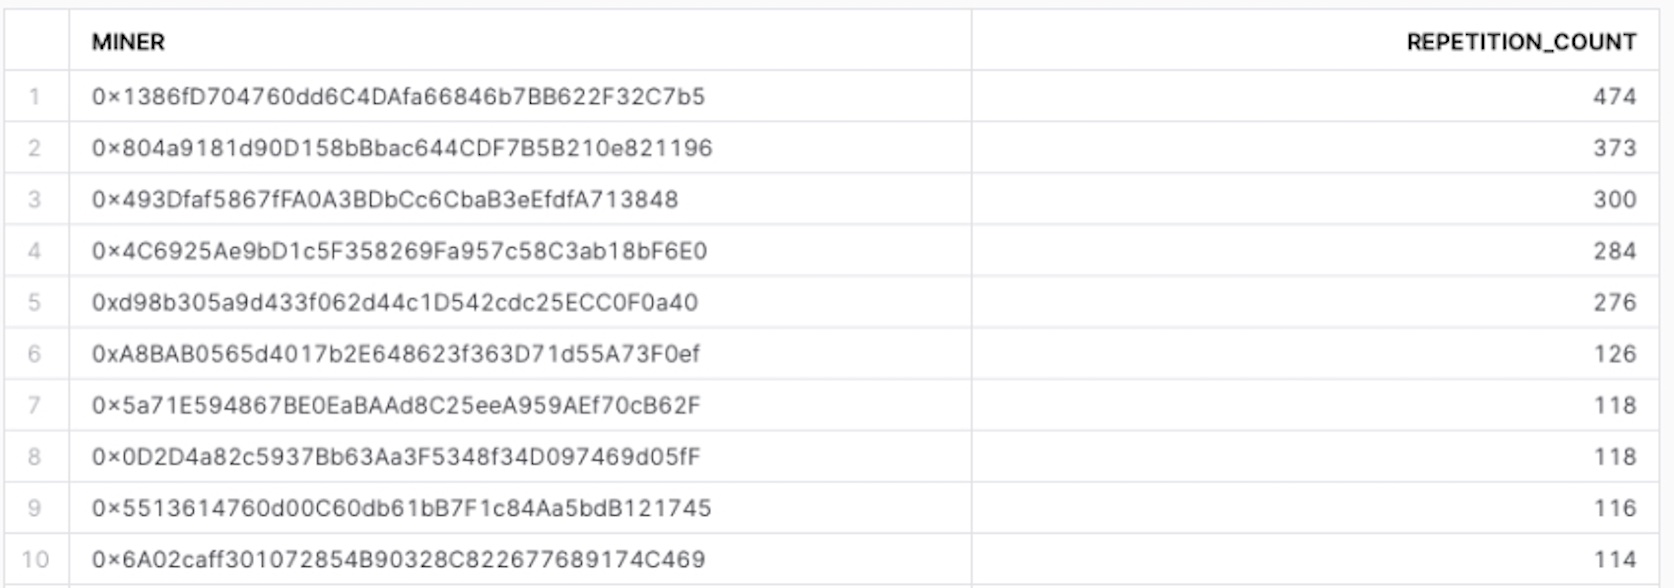
Selecting one and displaying results:
SELECT * FROM <DATABASE_NAME>.PUBLIC.POOL_8_VALUE
WHERE MINER = '<MINER_STRING>';
Showing transactions originating from a given sender:
-- list senders and receivers
SELECT "from", "to" FROM <DATABASE_NAME>.PUBLIC.POOL_8_VALUE_TRANSACTIONS limit 10;

-- query all transactions for a given sender
SELECT * FROM <DATABASE_NAME>.PUBLIC.POOL_8_VALUE_TRANSACTIONS WHERE "from" = '<RECEIVER_ADDRESS_STRING>';
Creating the Transactions View:
-- to avoid re-writing <DATABASE_NAME>.PUBLIC
USE DATABASE <DATABASE_NAME>.PUBLIC;

-- function to convert hex to numeric
  CREATE OR REPLACE FUNCTION hex_to_numeric(str TEXT)
  RETURNS VARCHAR
  LANGUAGE JAVASCRIPT
  AS
  $$
  const n = Math.floor(arguments[0].length / 8);
  let res = BigInt(0);
  str = arguments[0].padStart((n + 1) * 8, '0');
  for (let i = 0; i <= n; i++) {
    res *= BigInt('0x100000000');
    res += BigInt('0x' + str.substr(i * 8, 8));
  }
  return res.toString();
  $$;

SELECT TO_TIMESTAMP(POOL_8_VALUE.timestamp) AS timestamp,
    POOL_8_VALUE_TRANSACTIONS."from",
    POOL_8_VALUE_TRANSACTIONS."to",
    POOL_8_VALUE_TRANSACTIONS_value.hex,
    hex_to_numeric(SUBSTR(POOL_8_VALUE_TRANSACTIONS_value.hex, 3)) AS int8_value,
    POOL_8_VALUE_TRANSACTIONS.data
FROM POOL_8_VALUE_TRANSACTIONS
JOIN POOL_8_VALUE ON POOL_8_VALUE._airbyte_value_hashid = POOL_8_VALUE_TRANSACTIONS._airbyte_value_hashid
JOIN POOL_8_VALUE_TRANSACTIONS_value ON POOL_8_VALUE_TRANSACTIONS._airbyte_transactions_hashid = POOL_8_VALUE_TRANSACTIONS_value._airbyte_transactions_hashid
LIMIT 10;
That's it! You've successfully created an end-to-end ELT pipeline fetching data from a KYVE data pool and importing it into a Snowflake Warehouse.