Postgres Destination
This page will guide you through setting up an ELT pipeline to fetch data from
a KYVE data pool and import it into a local Postgres database.
Postgres Setup
In this step, you will deploy a local Postgres database using Docker.
Run the following command to create a container with the latest Postgres image:
docker run --name local-psql -v local_psql_data:/var/lib/postgresql/data -p 5432:5432 -e POSTGRES_PASSWORD=pass -d postgresAccess the Postgres terminal to set up a database for the pipeline's destination:
docker exec -it local-psql psql -U postgresIn the Postgres terminal, run the following commands:
CREATE DATABASE kyvetest;CREATE USER airbyte_user WITH ENCRYPTED PASSWORD 'pass';GRANT ALL PRIVILEGES ON DATABASE kyvetest to airbyte_user;\connect kyvetestGRANT ALL ON SCHEMA public to airbyte_user;A database named
kyvetesthas been created and the userairbyte_userwith passwordpassnow has read and write access.Install the pgAdmin 4 management tool.
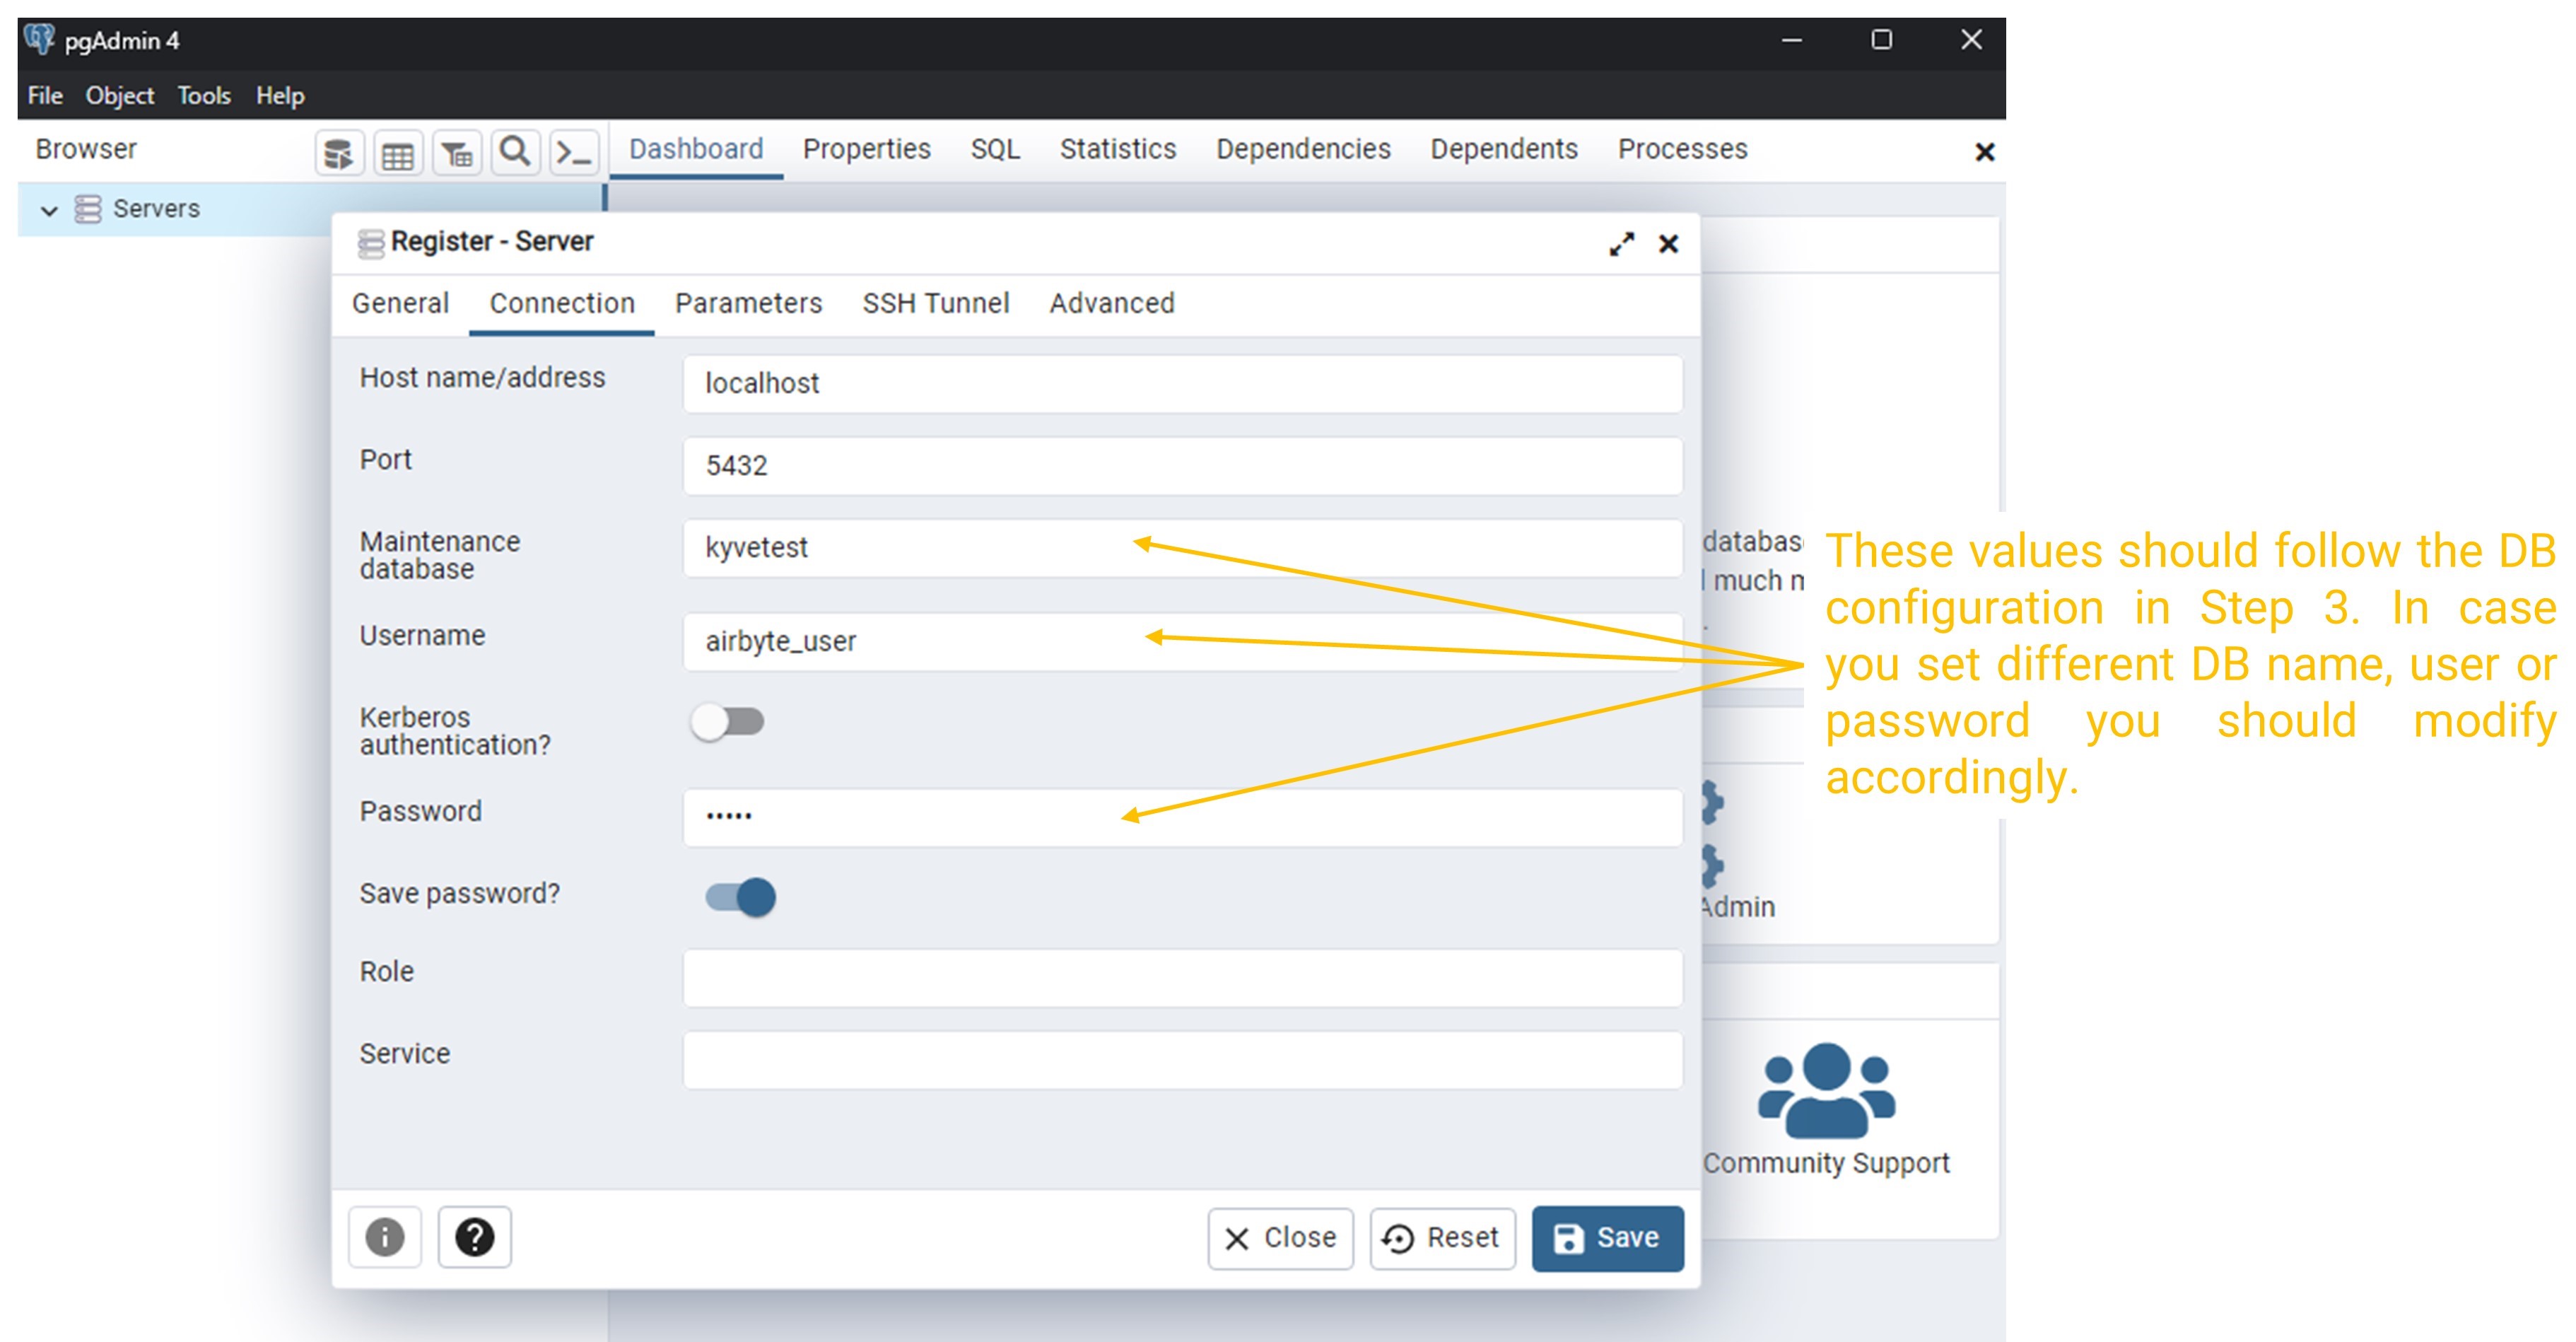
Click on "Add New Server" and create a connection with the
kyvetestdatabase. As show in the figure bellow you should add the following parameters:- Maintenance database:
kyvetest - Username:
airbyte_user - Password:
pass(in case you did not modify it from step 3.1)
- Maintenance database:
Configure Airbyte
Now you are ready to go on the Airbyte app (http://localhost:8000/) and create a new connection.
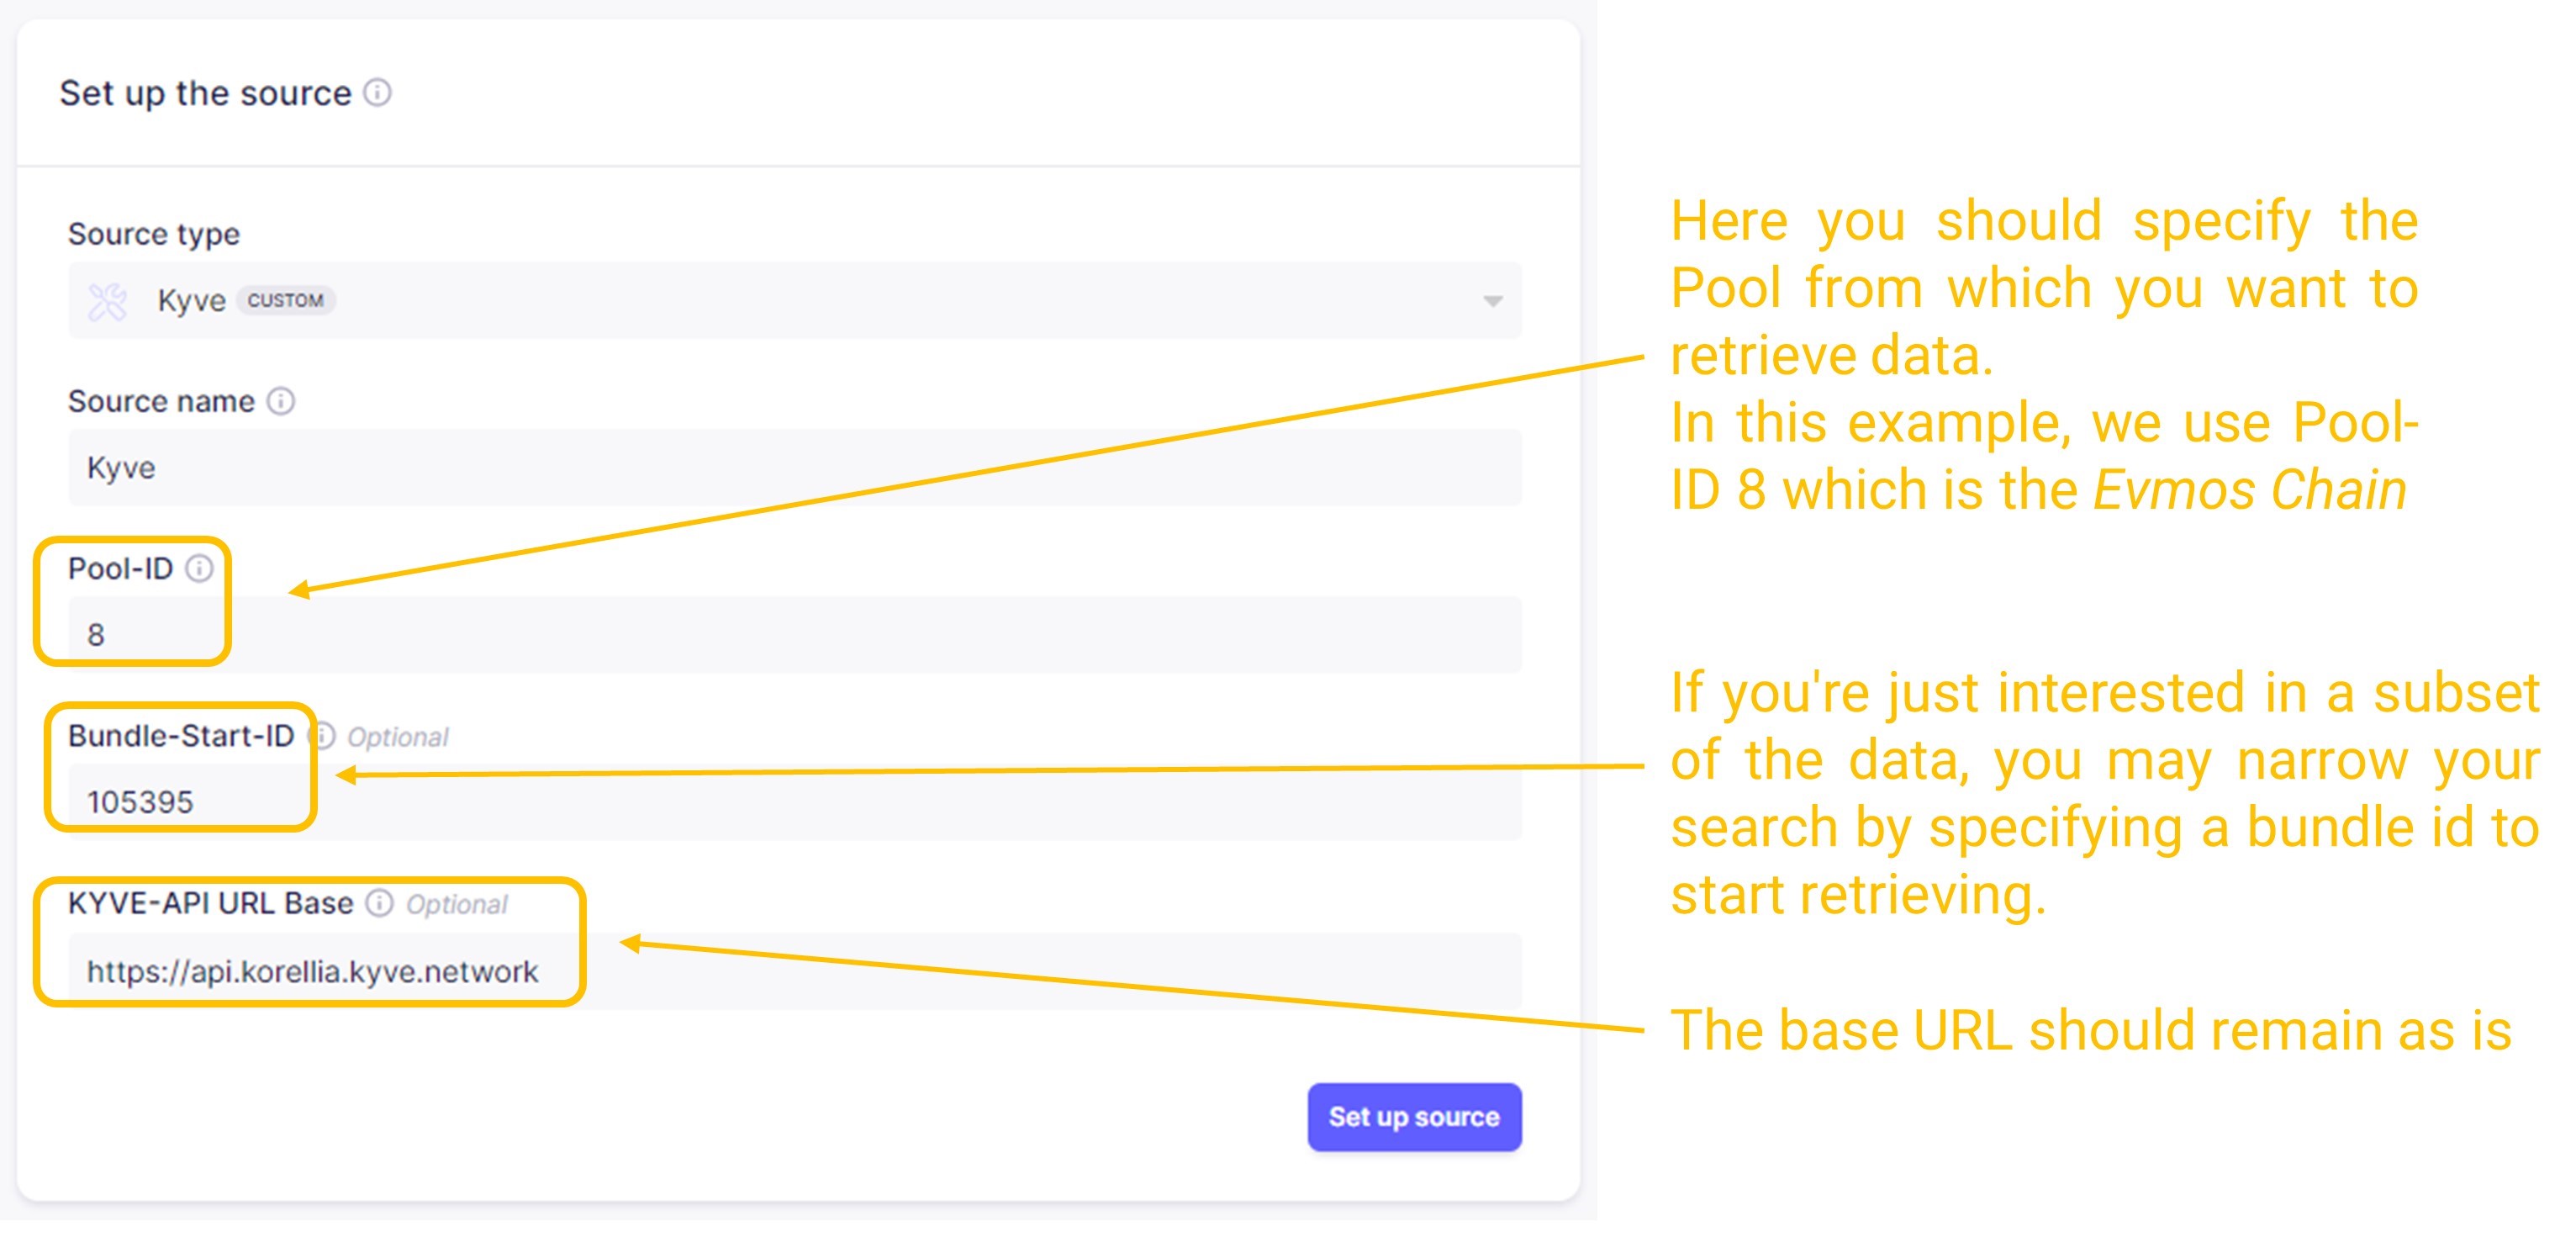
Set up the source.
In this step you should specify the Kyve pool from which you want to retrieve data. You can specify a specific Bundle-Start-ID in case you want to narrow the records that will be retrieved from the pool. You can find the bundles of your pool choice in the KYVE app. For example here are the bundles of Pool ID
8, the Evmos chain.For this example we choose:
- Pool-ID:
8which refers to the Evmos chain. - Bundle-Start-ID:
105395(or choose anotherBundle-Start-ID) - KYVE-API URL Base: This should remain as is.
- Pool-ID:
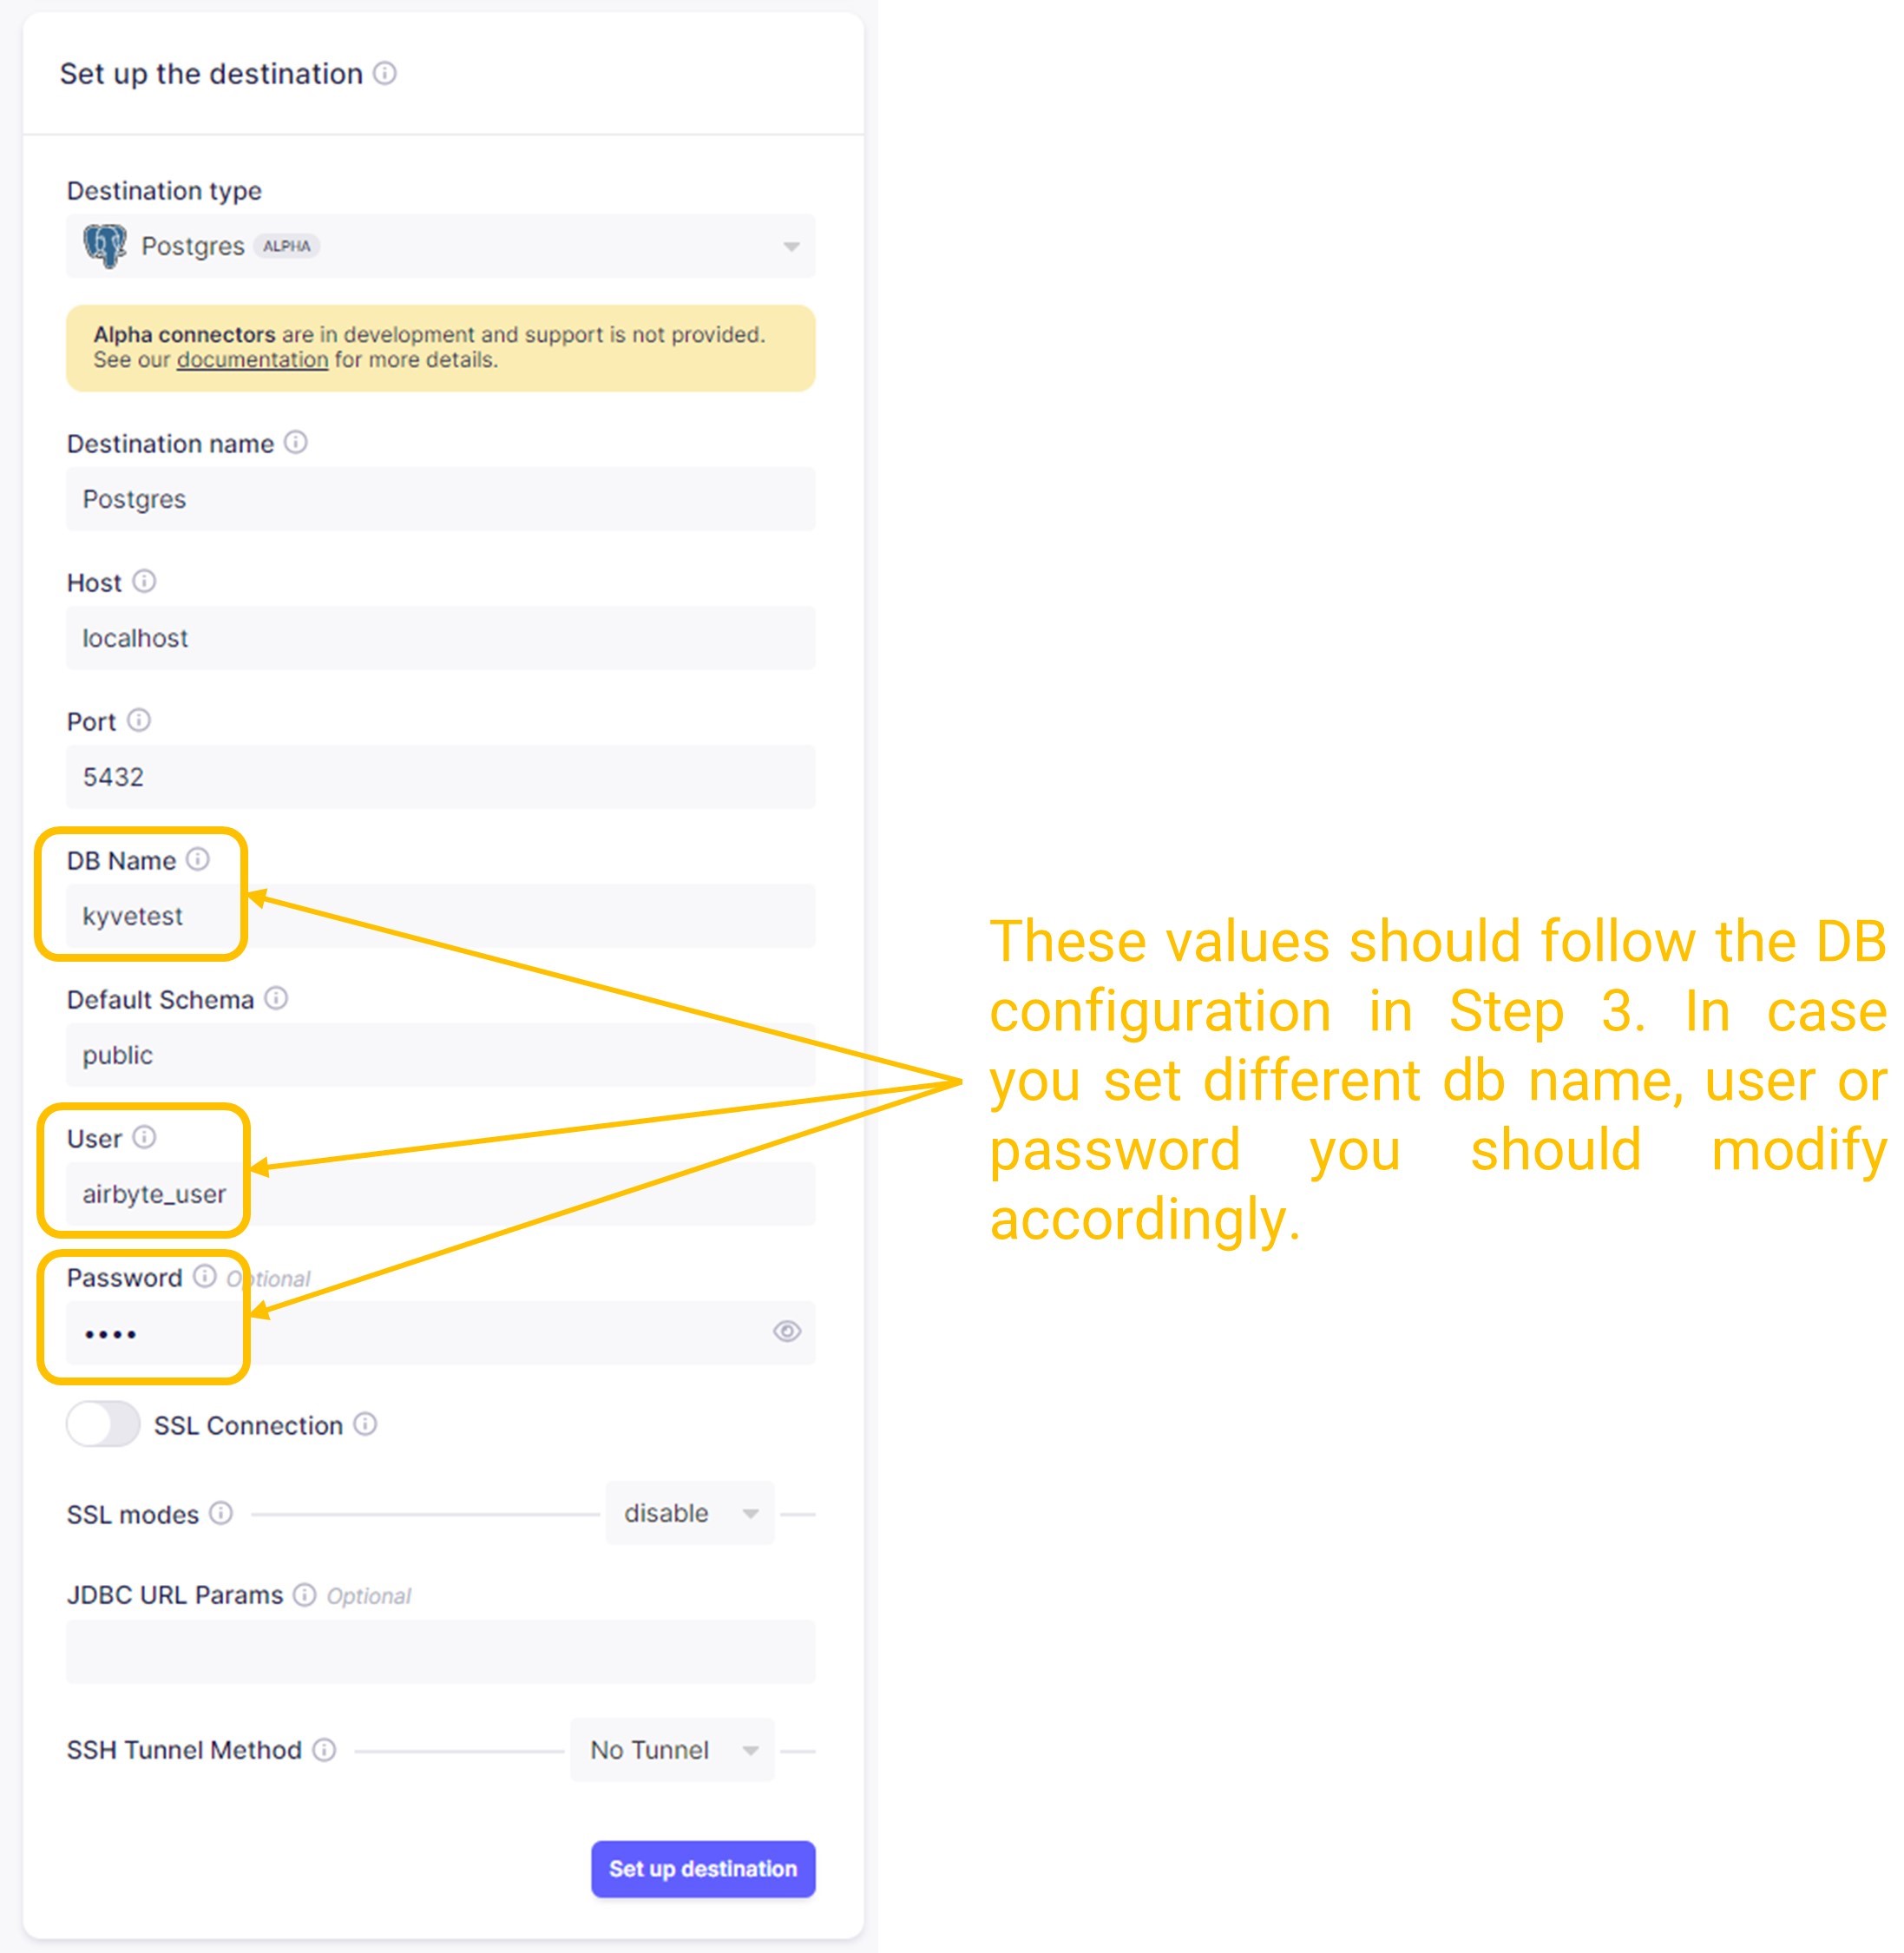
Set up the destination.
Add the parameters of the Postgres DB that you set here.
- DB Name:
kyvetest - User:
airbyte_user - Password:
pass
- DB Name:
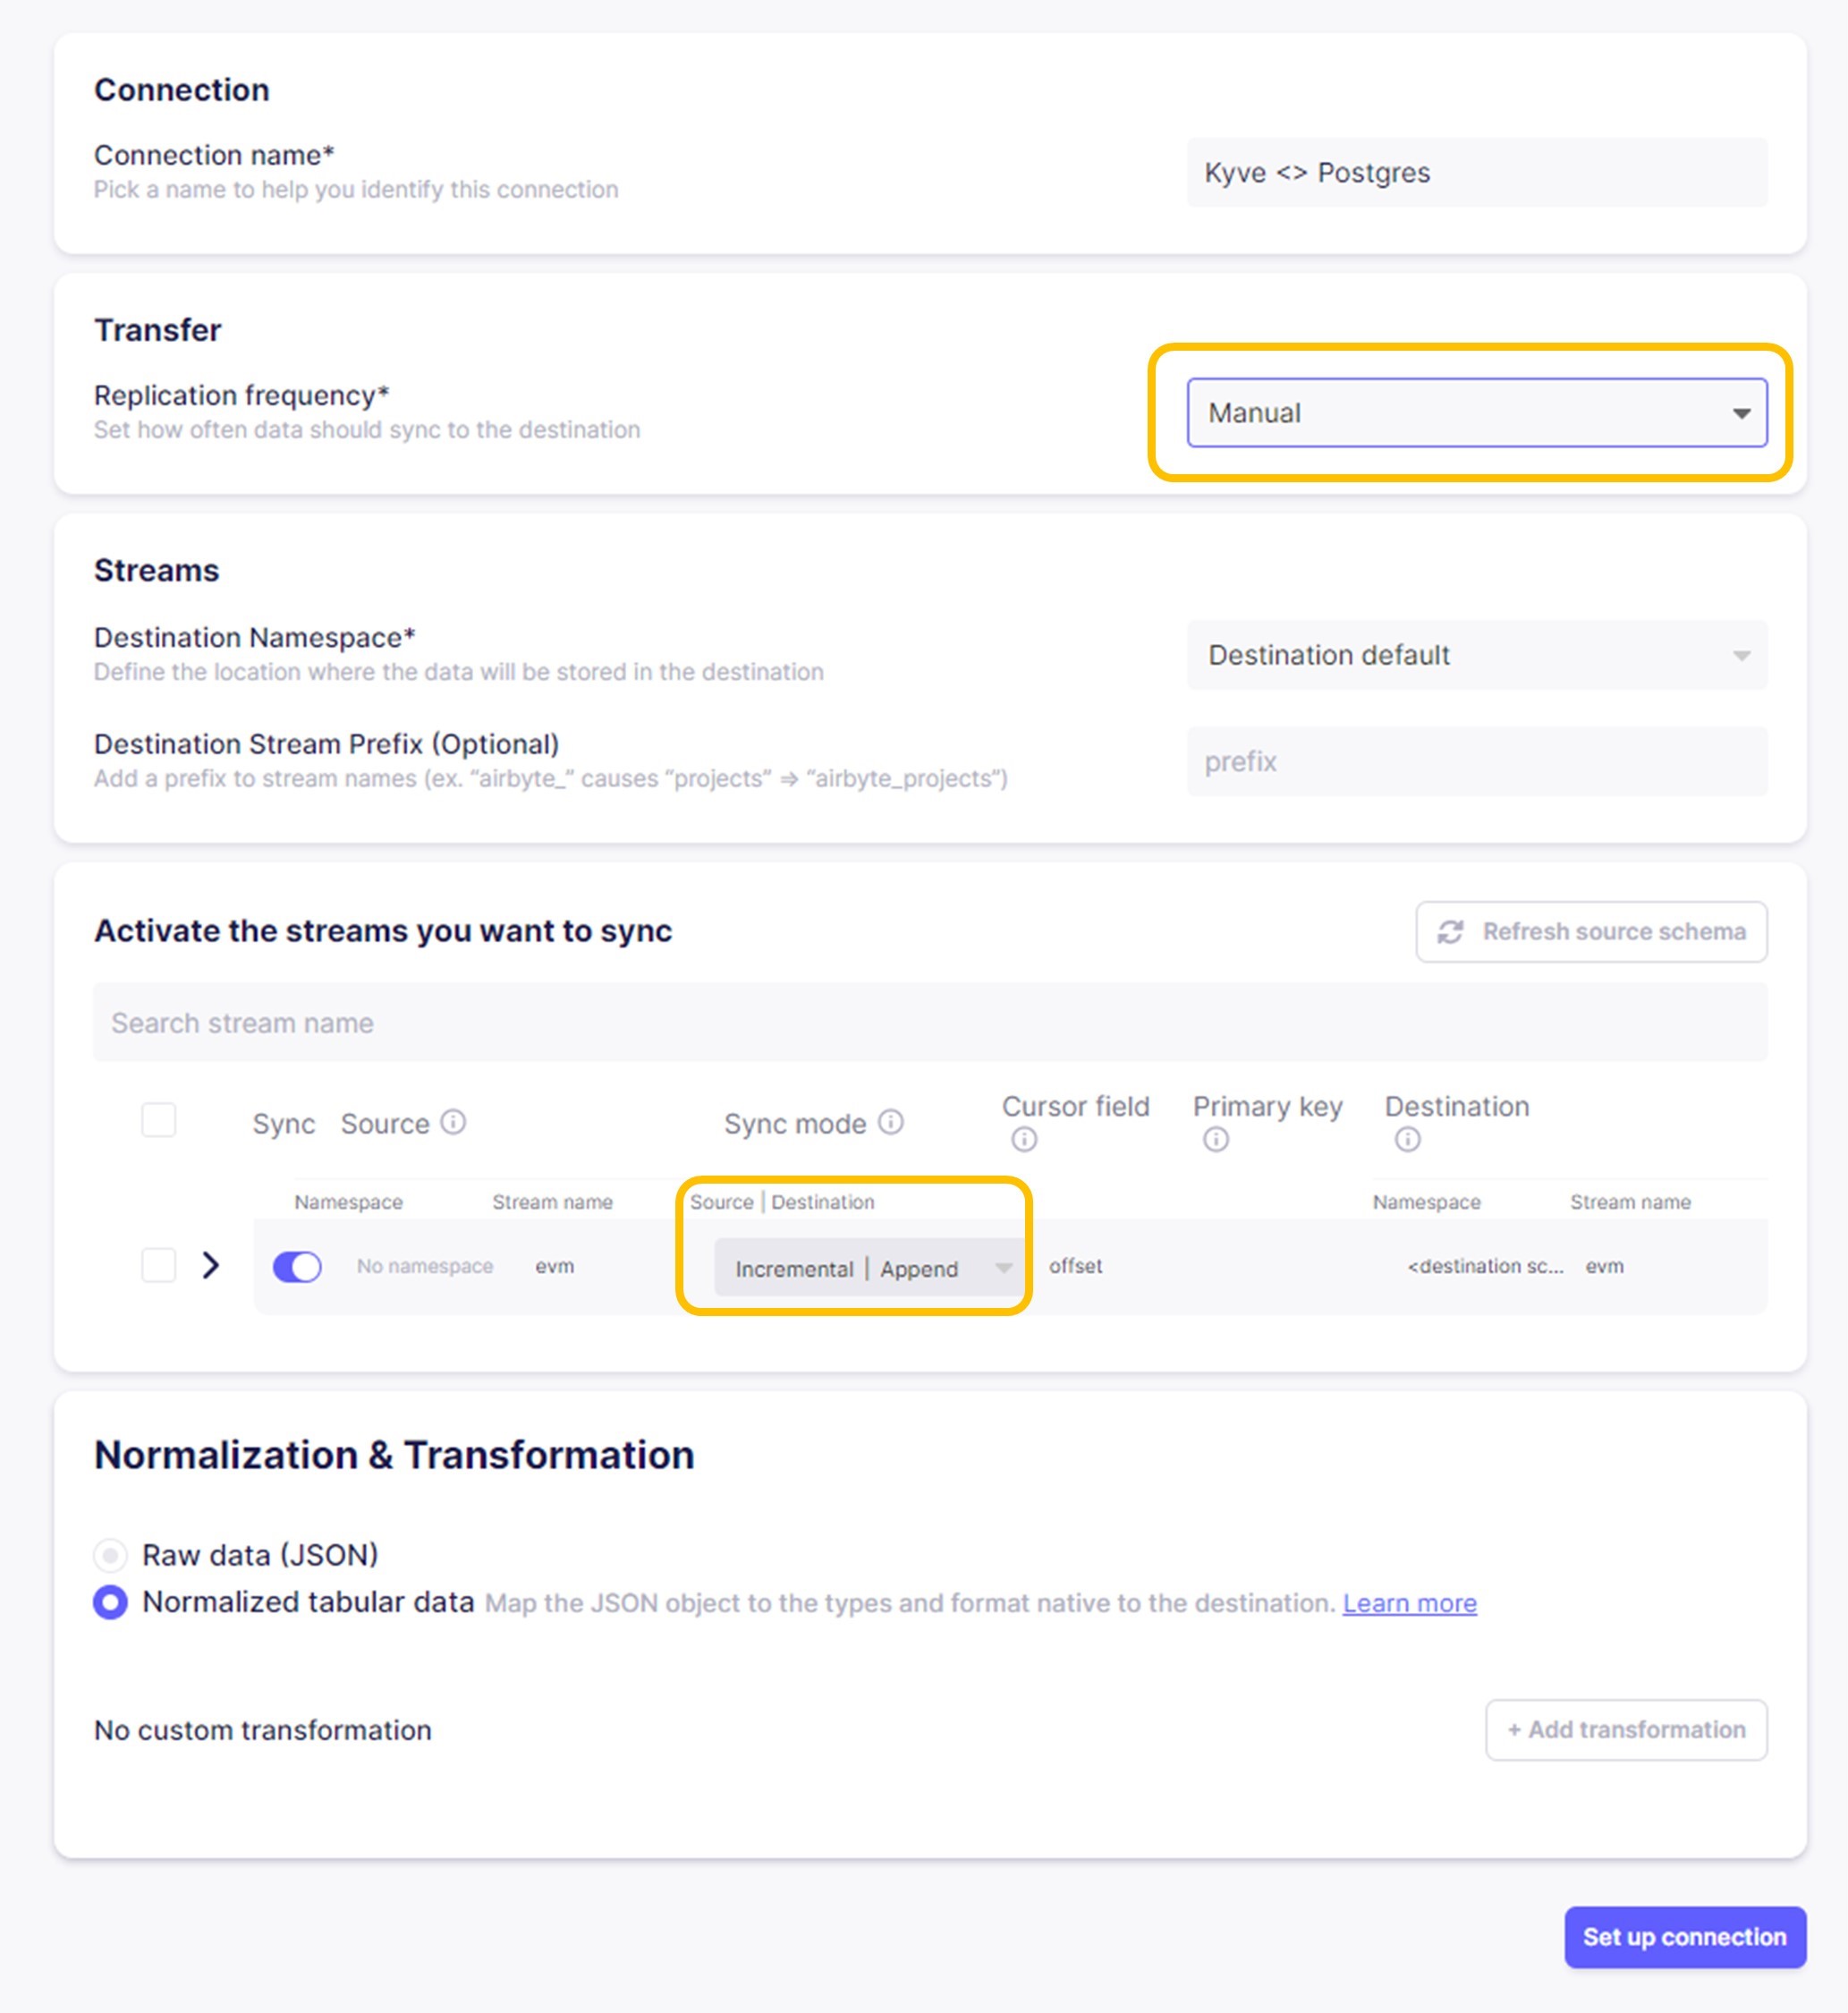
Final ELT configuration.
This is the final step where you can modify the pipeline.
- In the Transfer field, you can set how often the data should sync to the destination. For this example, we set
it to
Manual. - In the Streams section, you can modify the Namespace, and you can add a Prefix for the data that will be stored.
- In the Activate the streams you want to sync section, you can modify the behavior of the stream in each
repetition. For this example, you could set it to
Incremental|Append, which means that only new records will be stored on each new sync and will be appended in the DB.
- In the Transfer field, you can set how often the data should sync to the destination. For this example, we set
it to
View Stored Data
For viewing the retrieved data, open pgAdmin or any other postgres management tool
that you have installed and connect to the kyvetest DB that you created in Step 3 of the
Postgres local deployment.
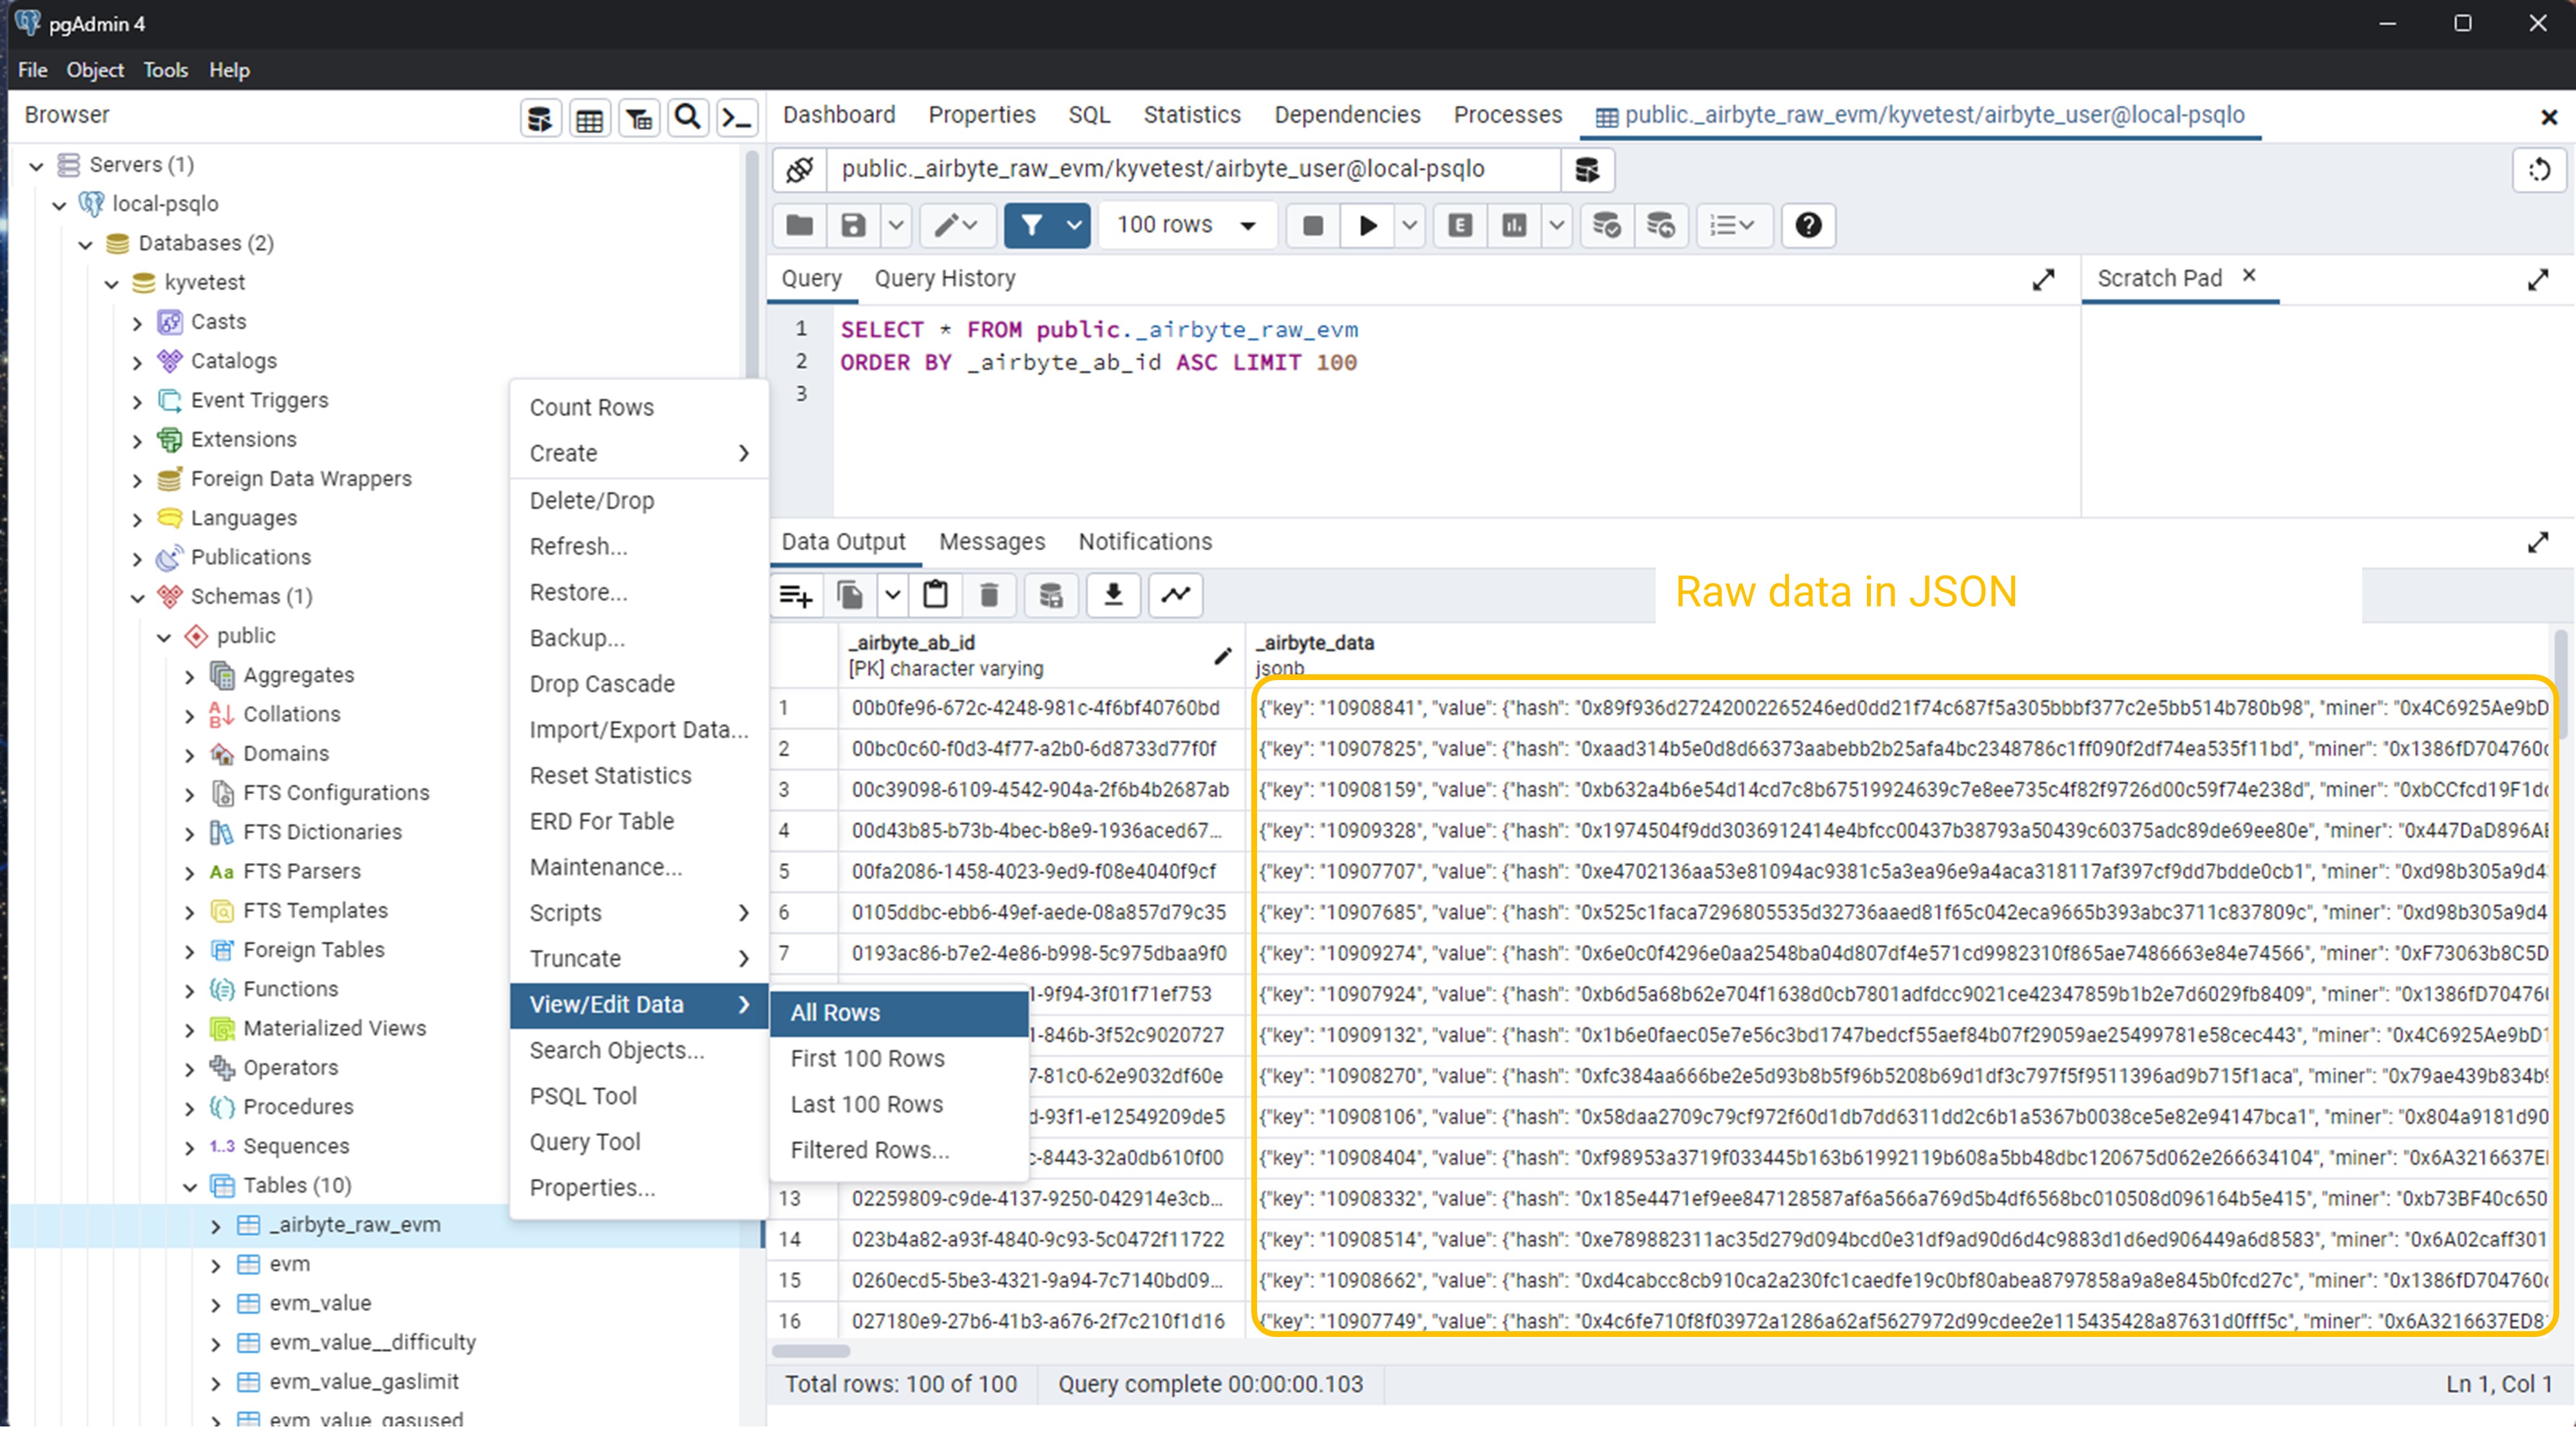
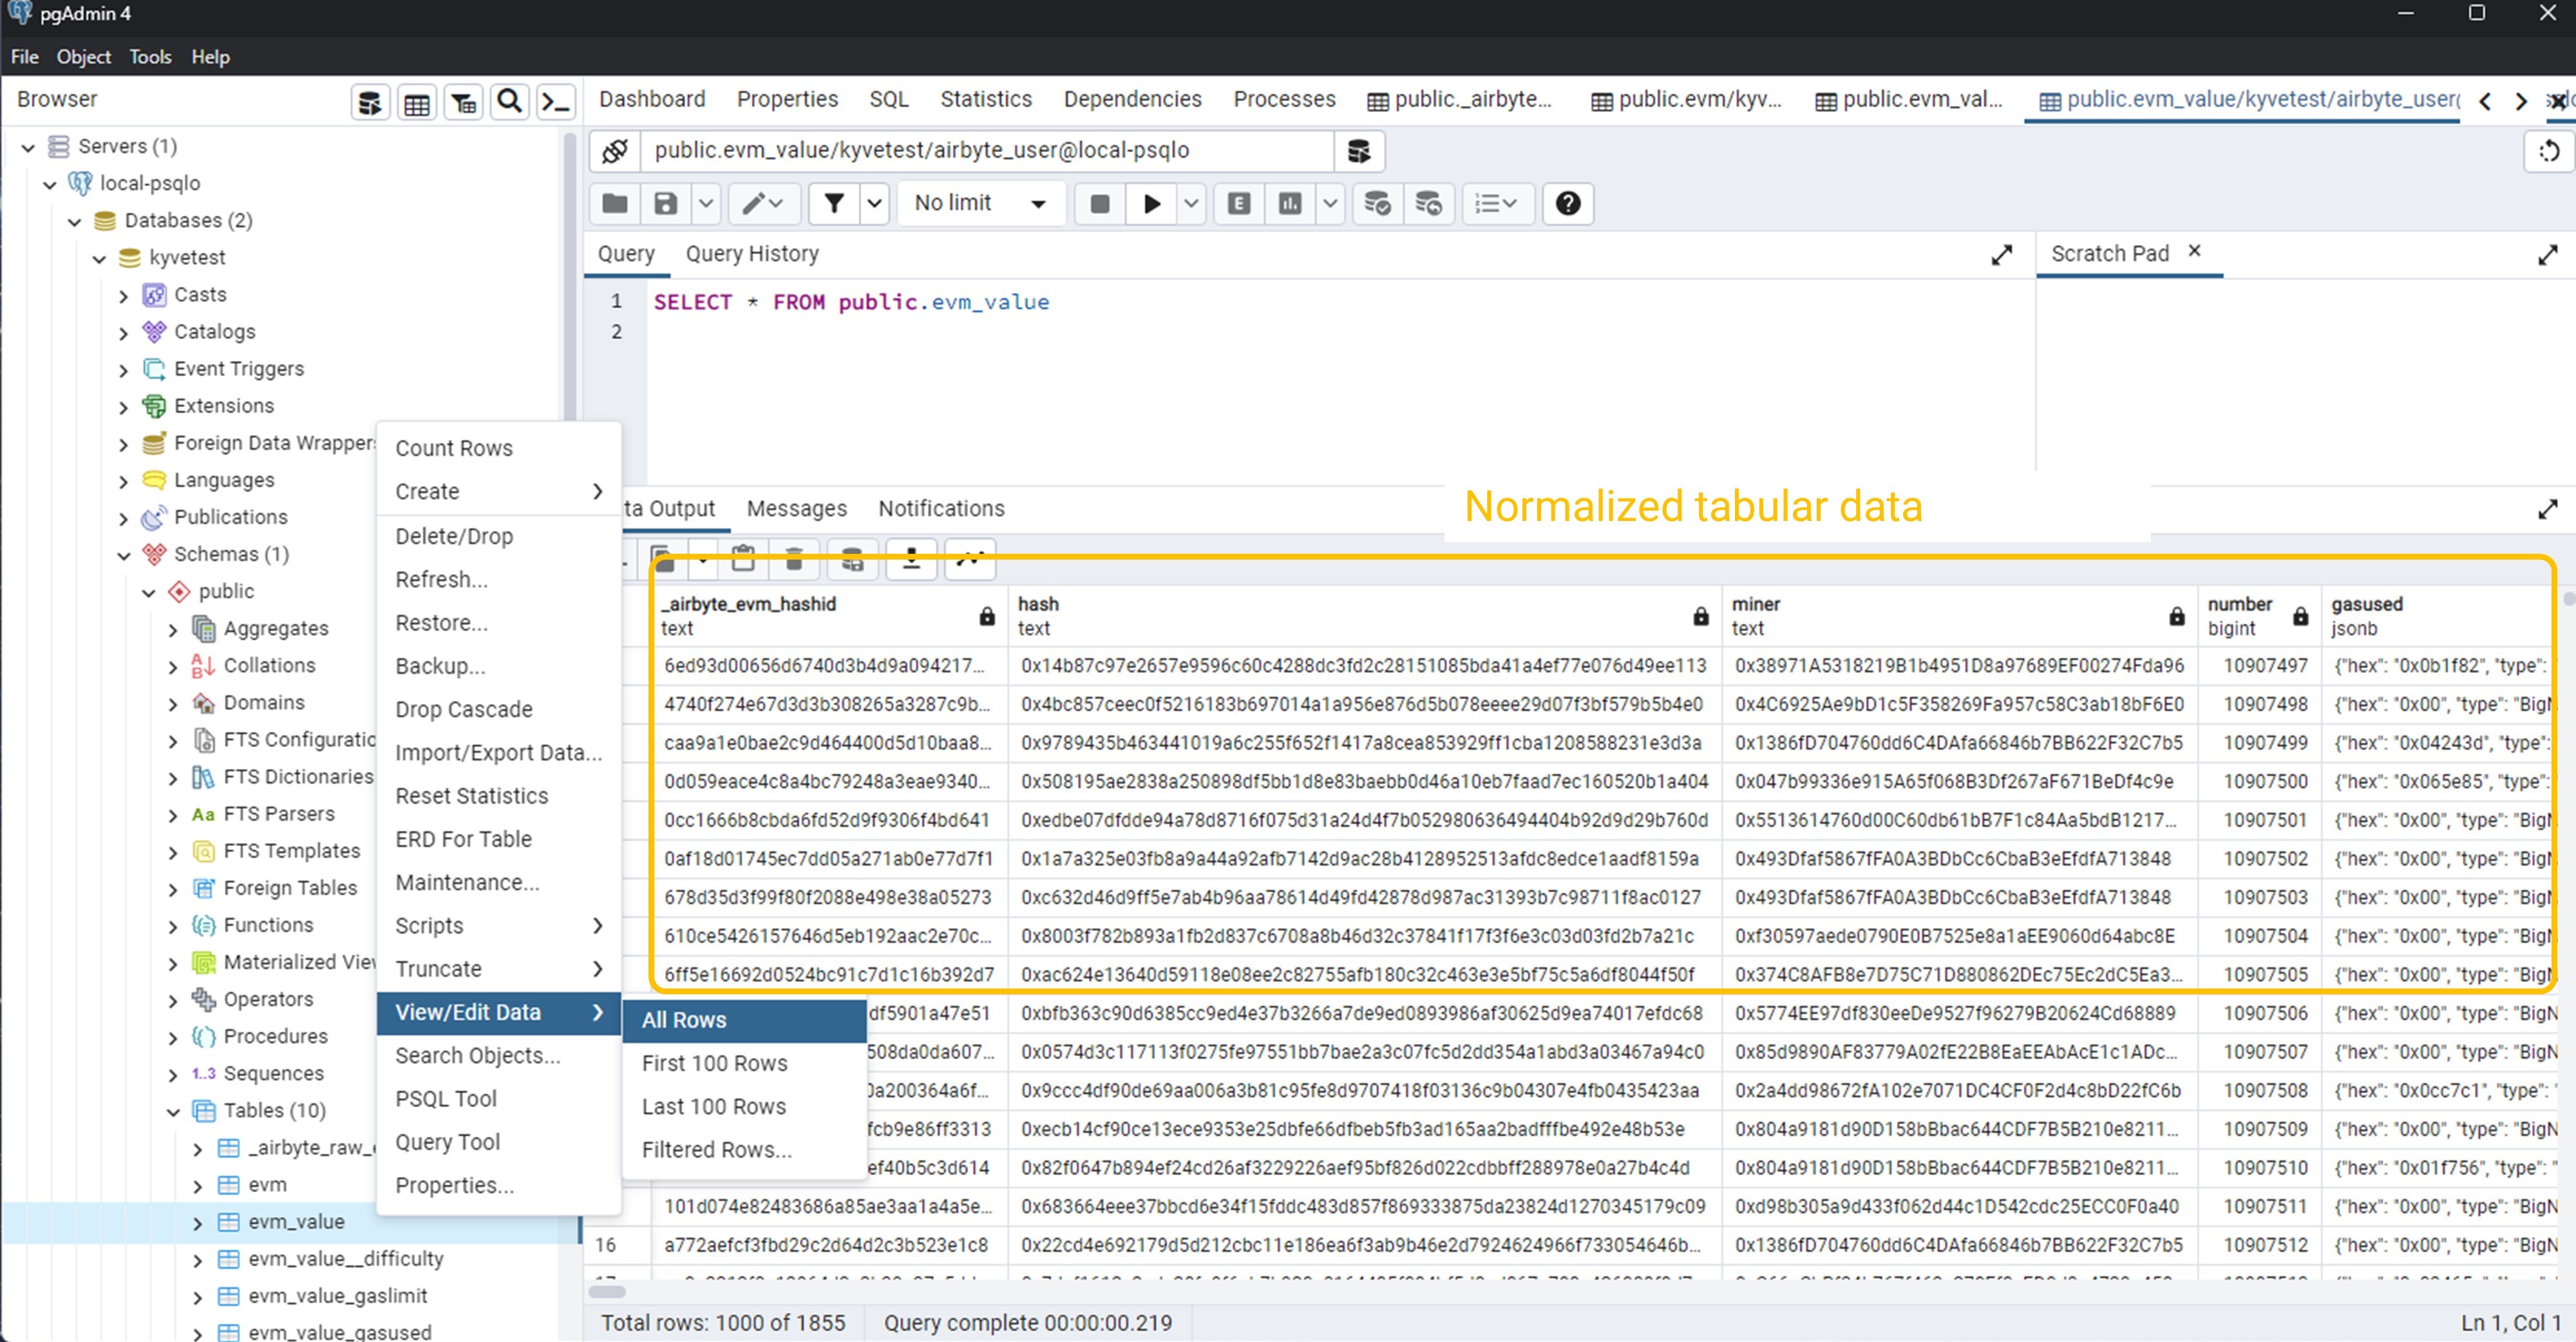
In the public schema, you will find the retrieved records in both raw and normalized formats.
Raw format
Normalized format
That's it! You've successfully created an end-to-end ELT pipeline fetching data from a KYVE data pool and importing it into a local Postgres database.