Requirements
Before you can run protocol nodes, there are some basic requirements that have to be met, ranging from simple hardware specs to owning a certain amount of $KYVE and other currencies.
Supported OS
We officially support macOS and Linux in the following architectures:
macos-x64linux-x64linux-arm64
Minimum Hardware Requirements
To run mainnet of testnet protocol nodes, you will need a machine with the following minimum hardware requirements:
- 1 or more physical CPU cores
- At least 8 GB of disk storage
- At least 2 GB of memory (RAM)
- At least 50mbps network bandwidth
Pool Delegation Requirements
Choose a Storage Pool
Before you can run a protocol node you have to choose a pool you want to join. You can find an overview of all pools in the KYVE app: https://app.kyve.network/#/pools.
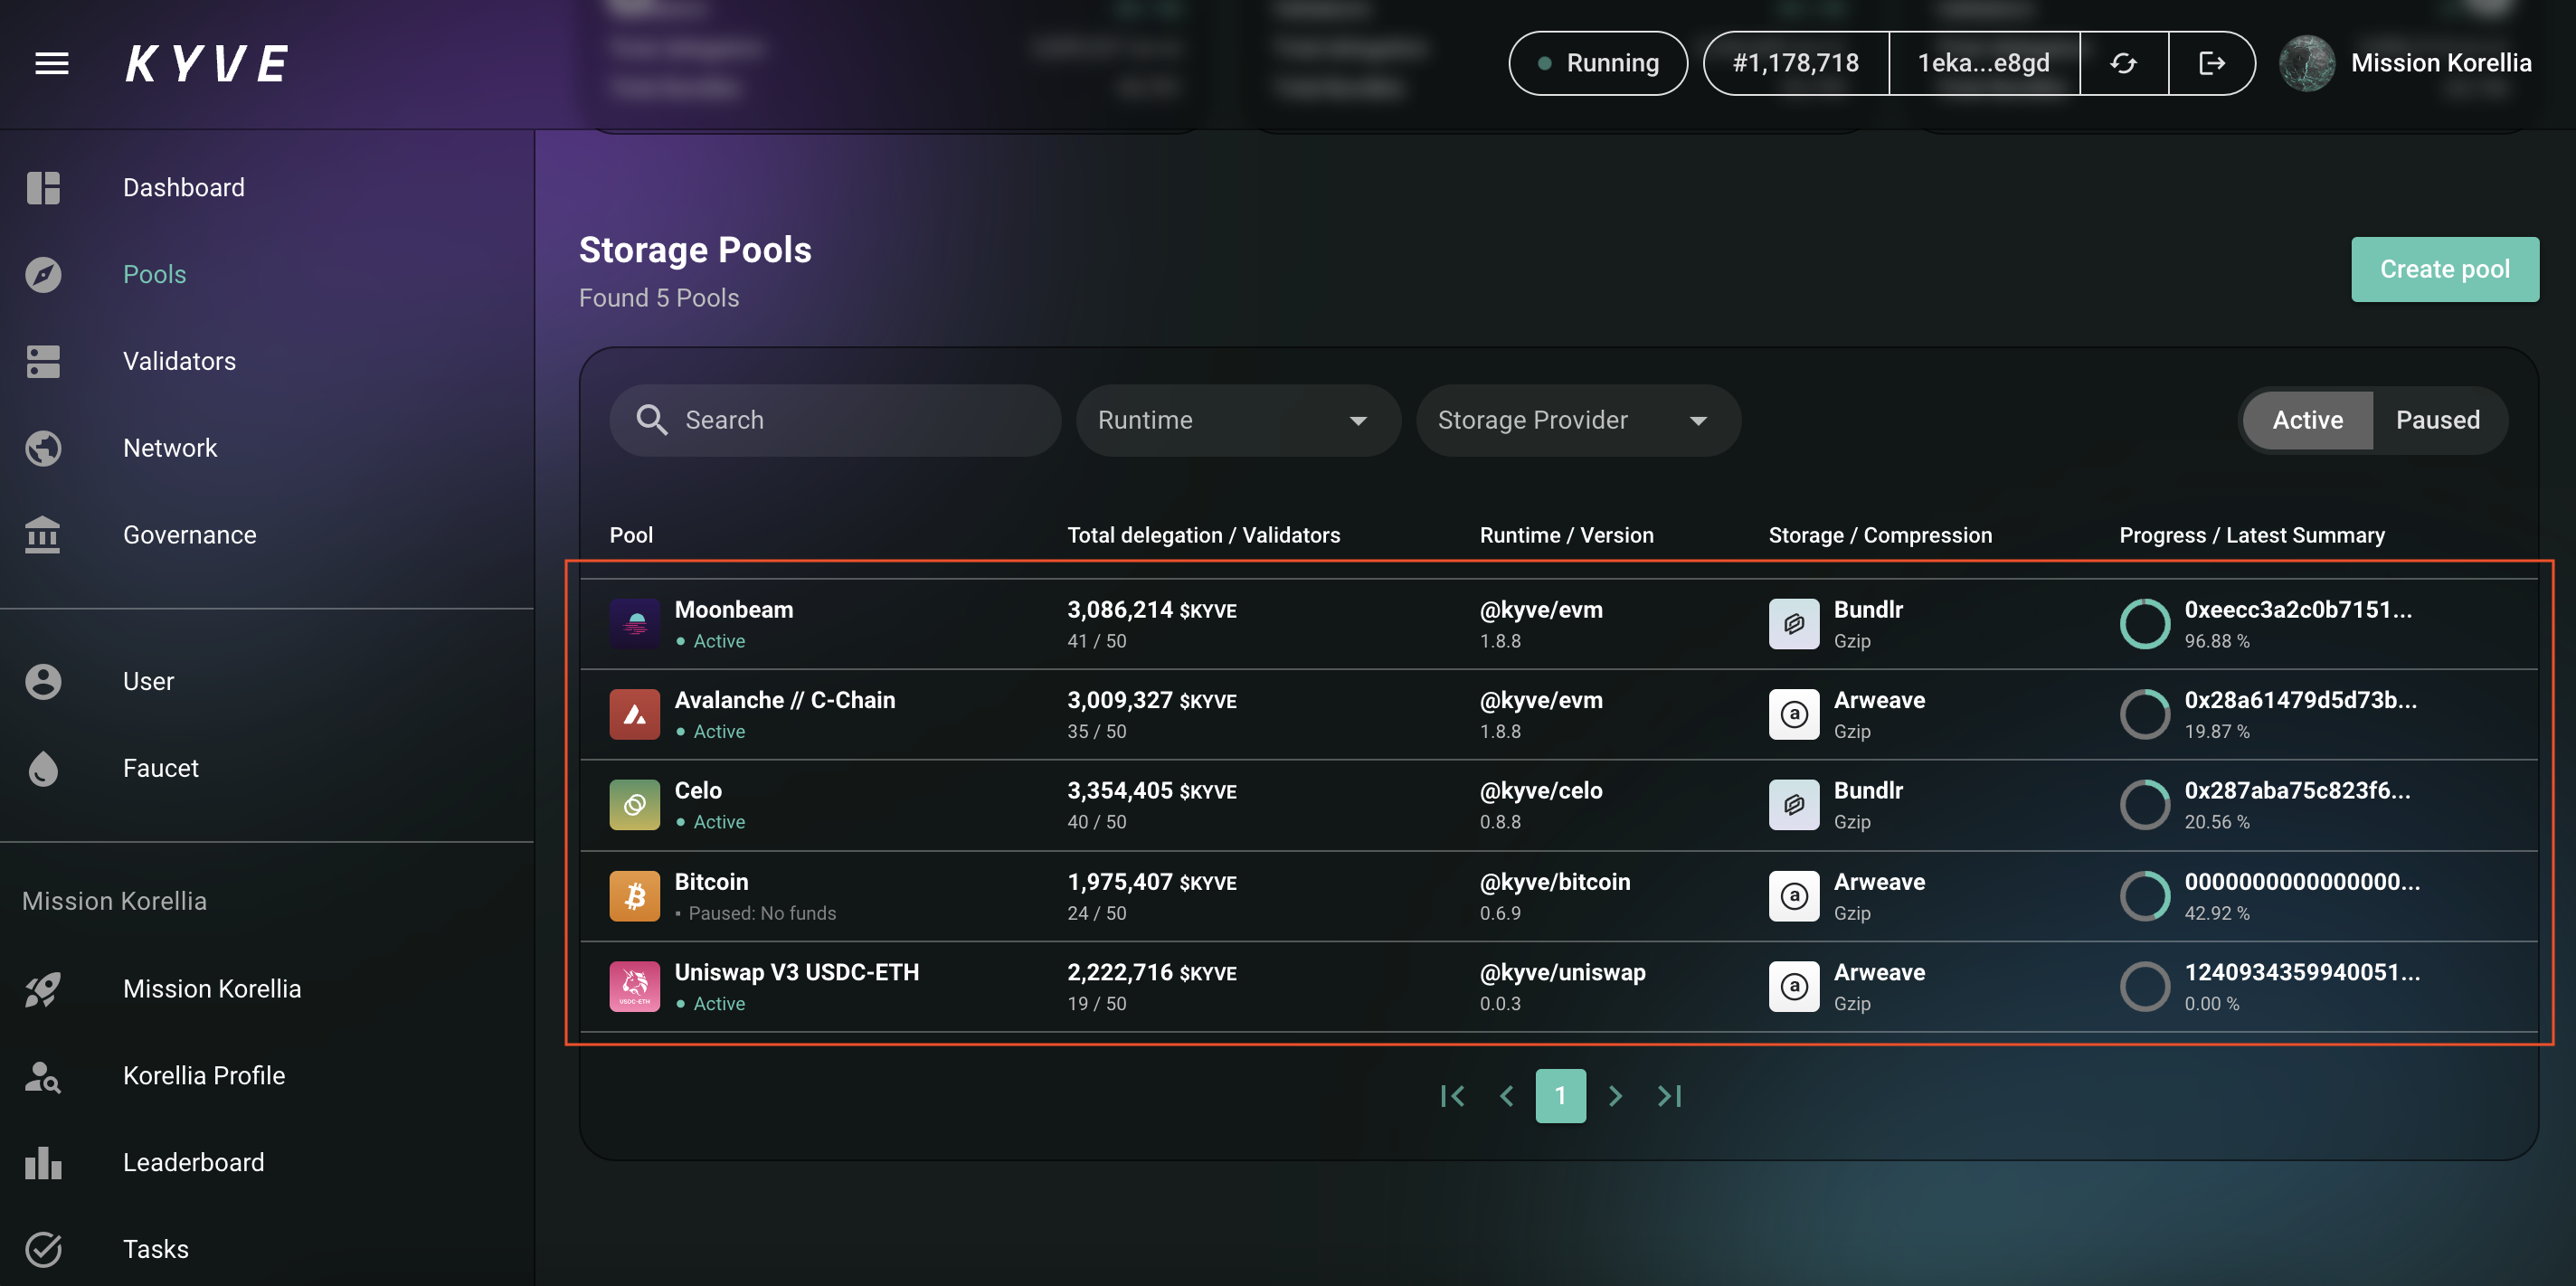
Here you can already see some options. Since, in this example, the Bitcoin pool is paused due to the lack of funds,
it would be smarter to join the other active pools. Other metrics can be also added to your decision in which pool
you would want to participate in. Example metrics could include the amount of slashes which occurred in the pool (can be found when you click on pool then metrics), or the APYs that other protocol node operators have running in that pool.
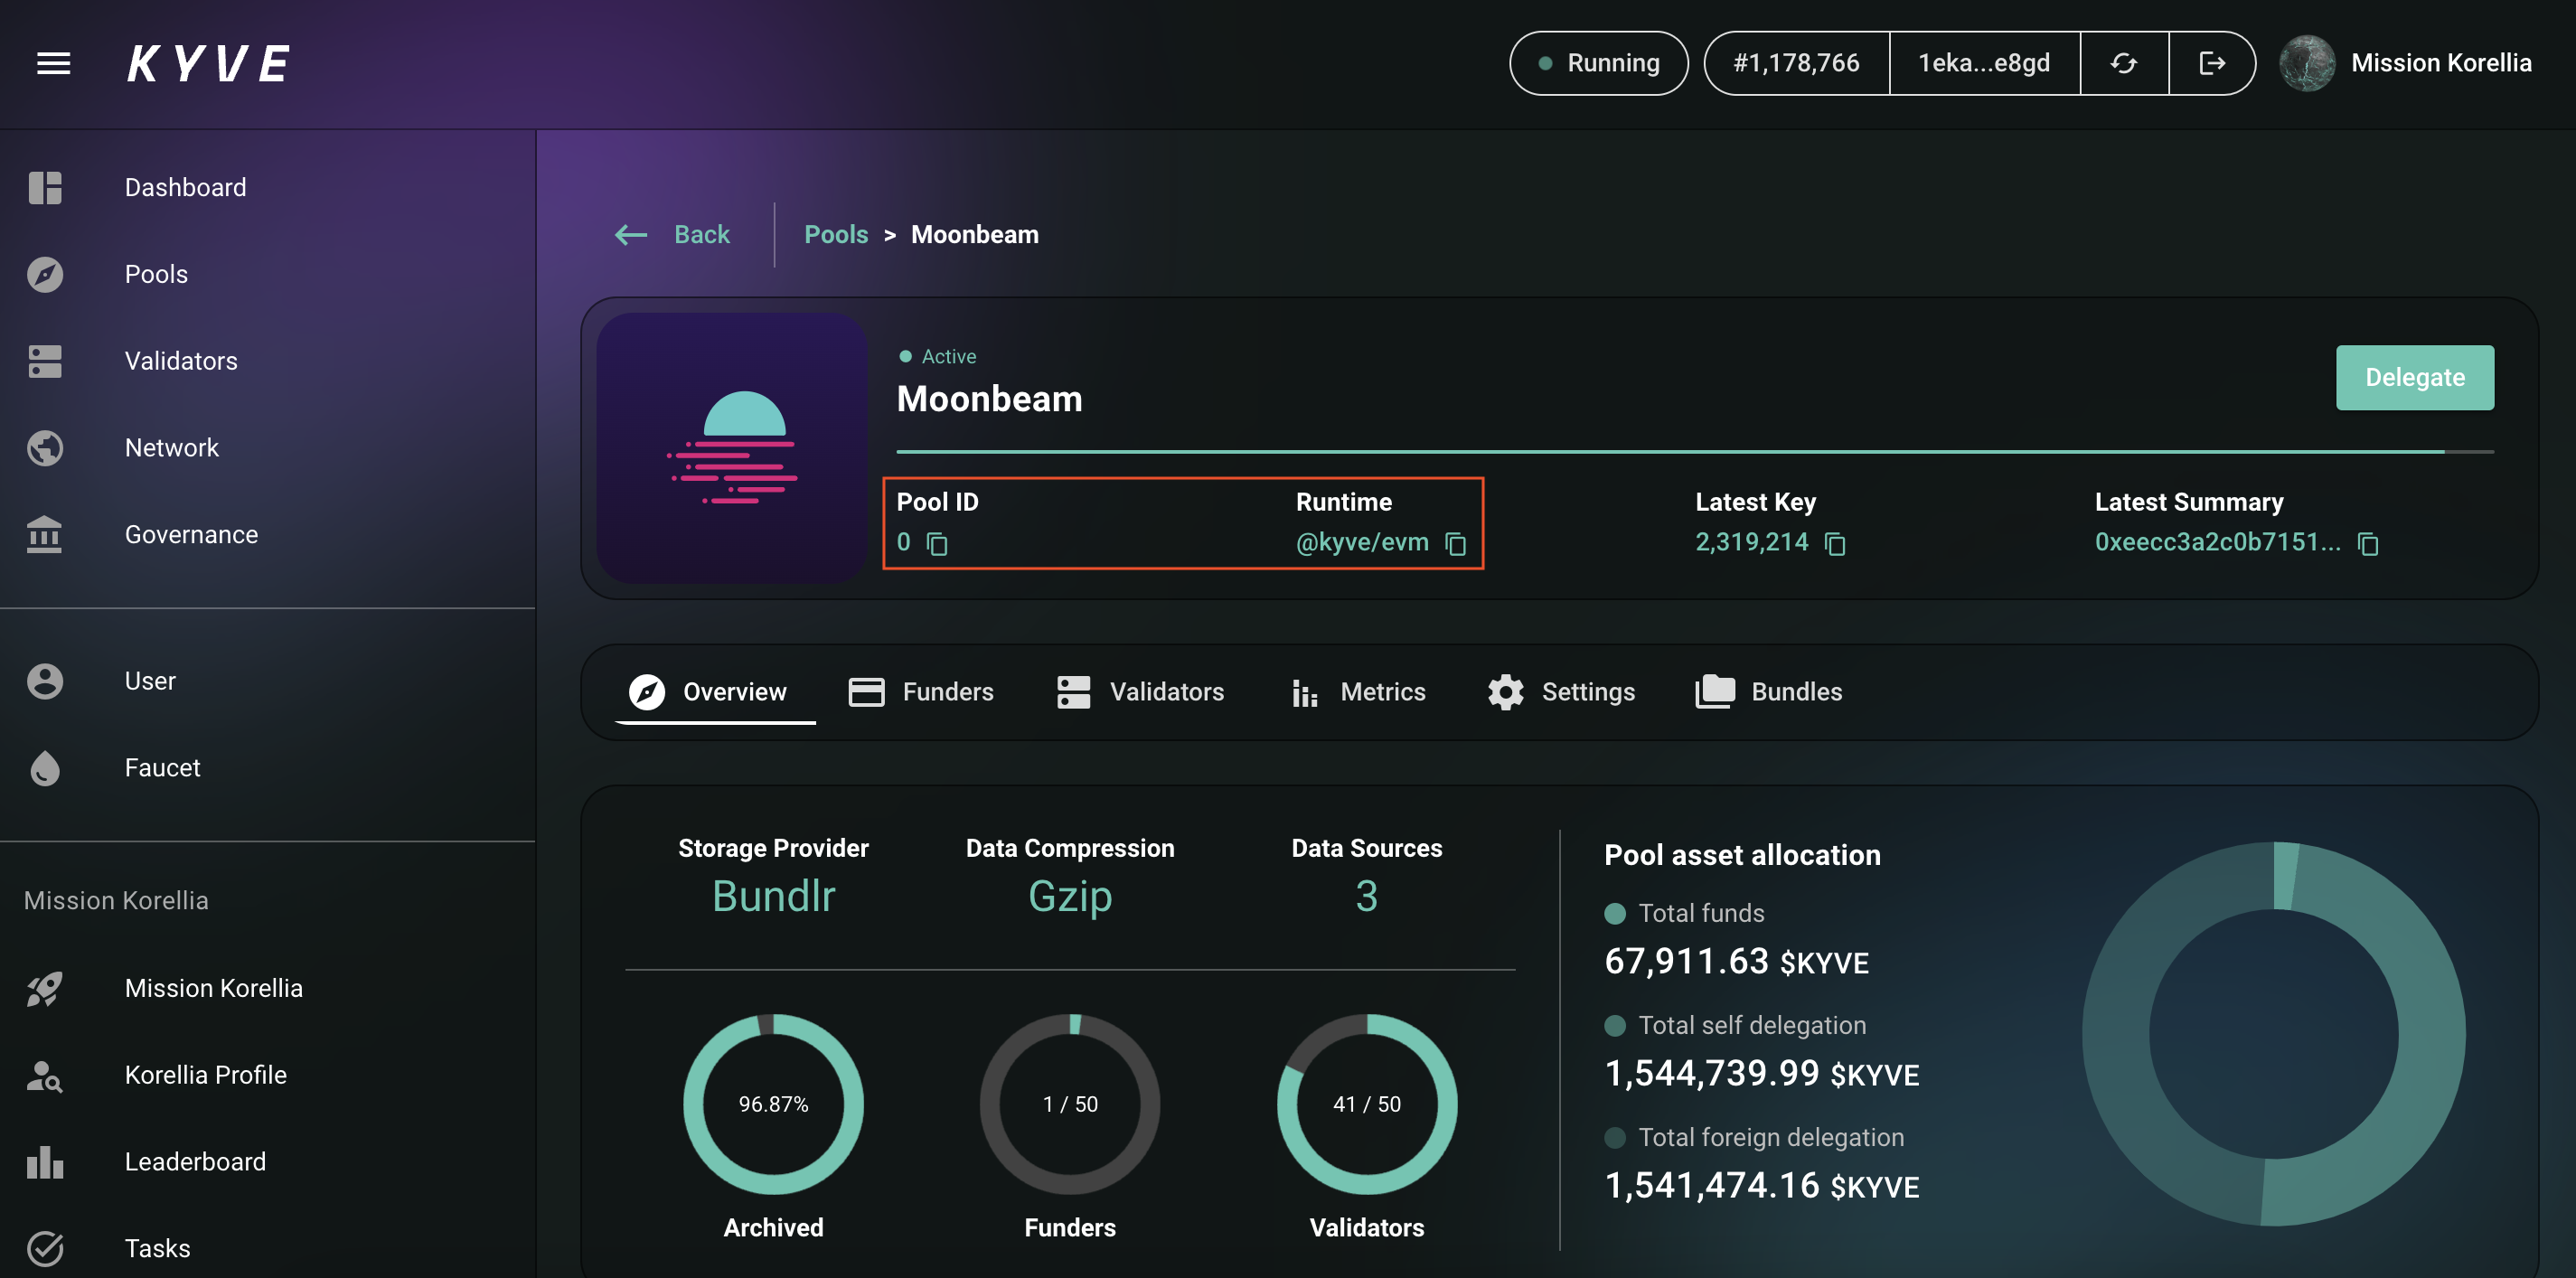
Once you have chosen a pool, you need to remember the pool id and the
pool runtime for later. Both can be found when you click on the pool overview. In this example, we have chosen the first pool with the pool id 0 and the runtime @kyvejs/evm.
Verify if you have enough $KYVE to participate
Due to a limited number of validator slots in each pool, only the nodes with the highest delegation can claim a validator slot. You can only claim a validator slot if you have more than the minimum delegation amount.
To check the minimum delegation amount you can click on the tab Validators once you have selected a pool. There you should see something like this:
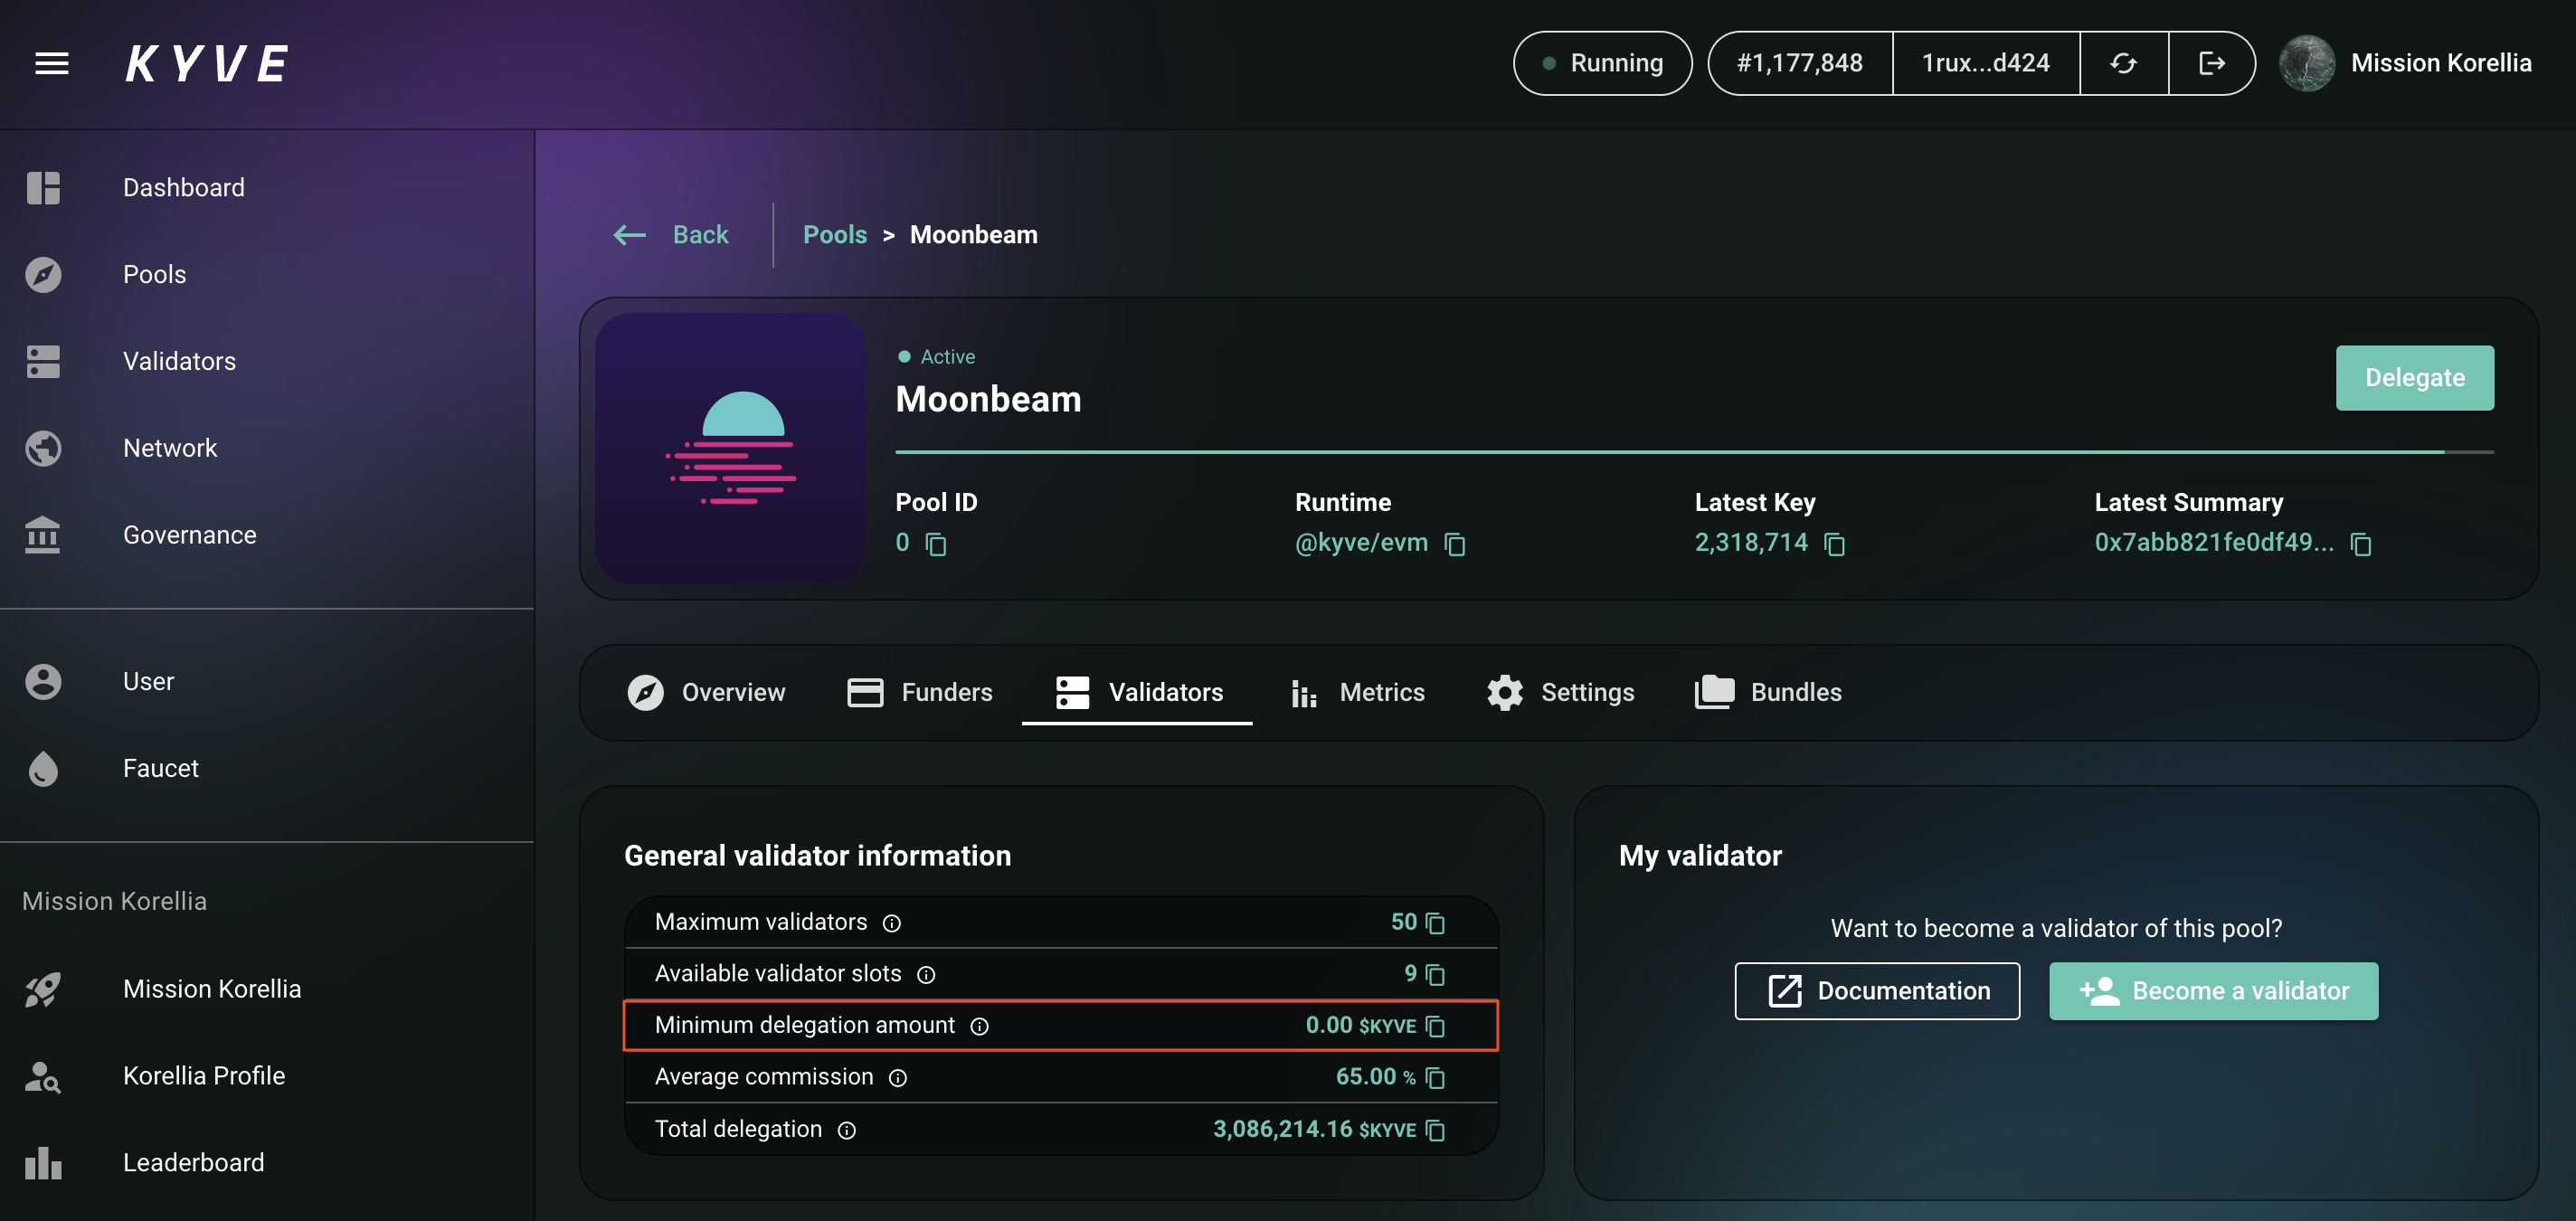
In this case, there are still 9 free validator slots, so you just have to have more than 0 $KYVE of delegation in order to participate. If the slots would be full and the minimum delegation would be, for example, 300 $KYVE, you have to have more than 300 $KYVE delegated in your validator.
IMPORTANT: If you don't have more $KYVE than the minimum delegation amount, you can not continue
Storage Provider Requirements
Because a storage pool is always archiving the data on a web3 storage provider, the protocol node must have access to a funded wallet in order to be able to actually upload data to those storage providers.
Depending on which storage provider the pool runs, on you have to setup a wallet with which you can upload data with. Currently, there are two available storage providers:
On the pool overview, it is clearly listed which storage provider a pool uses.
Setting up an Arweave Wallet
Arweave is a truly decentralized, permanent data storage solution.
In order to setup an Arweave wallet you need a keyfile which will be the private key of Arweave. You can get one with some additional funds from the official Arweave faucet (https://faucet.arweave.net/). Because this amount won't be enough to let validators run for a longer time you have to get some additional $AR. You can exchange them on common exchanges. We would recommend an amount of ~1 AR which is more than enough.
Store the keyfile in a secure location you will need it again later in the installation process.
Setting up a Bundlr Wallet
Bundlr is a layer 2 solution for Arweave, bundling transactions and therefore making it much more scalable with guaranteed transaction finality.
In order to setup a Bundlr wallet follow the exact same steps as in Setting up an Arweave wallet. After completing the above steps the easiest way to setup the Bundlr wallet is to install the Bundlr CLI:
npm install -g @bundlr-network/client
In order to fund the Bundlr node simply execute the following, where arweave.json is your Arweave keyfile
which holds some funds:
$ bundlr fund 1000000000000 -h https://node1.bundlr.network -w arweave.json -c arweave

> ? Confirmation: send 1000000000000 Winston to dev.bundlr.network (35jqt51H71Tf4YmZfoGvN9FLw62a4aPnLgZa9KLdwLo)?
> Y / N y
> Funding receipt:
> Amount: 1000000000000 with Fee: 1379016 to 35jqt51H71Tf4YmZfoGvN9FLw62a4aPnLgZa9KLdwLo
> ID: 7cI6jpfpx6A2z8F5AoVHvZn9Az_BWPgvKzBCoE5w07A
In this example we funded Bundlr with 1 $AR which should be more than enough. After about ~30 minutes you can view your balance with:
$ bundlr balance 35jqt51H71Tf4YmZfoGvN9FLw62a4aPnLgZa9KLdwLo -h https://node1.bundlr.network -c arweave

> Balance: 1000000000000 Winston (1AR)
In order to withdraw your funds from Bundlr simply execute:
$ bundlr withdraw 500000000000 -h https://node1.bundlr.network -w arweave.json -c arweave

> ? Confirmation: withdraw 500000000000 winston from node1.bundlr.network (35jqt51H71Tf4YmZfoGvN9FLw62a4aPnLgZa9KLdwLo)?
> Y / N y
> Withdrawal request for 500000000000 winston successful
> Transaction ID: xcmxJmHyNS502fzqiT66rNeIOSldKGDWR8XsL9auDfs with network fee 1379016 for a total cost of 2858032
More information about the Bundlr CLI can be found here.
Store the keyfile in a secure location you will need it again later in the installation process.